One of the best ways to improve your home videos whether they are of family events, outings, or even videos you are making for online consumption is in the area of audio.
There is an old saying that the most important part of video is audio and in this case you can make your videos more watchable by making them more… listenable! (OK! I know that’s not really a word!)
Quite often when you are looking at other peoples videos you may have noticed that although the video itself seemed quite OK, there was something that seemed to be annoying about it or some way that it was failing to hold your attention.
More often than not it is actually the audio quality that is having that effect.
On this page I have laid out a simple procedure anyone can follow to quickly and efficiently clean up a narration or voiceover track.
The techniques apply to any voice recording you have done regardless of the source but before that always remember when you are recording a voice to set your device at the highest possible quality.
Some devices don’t offer this but many do, so take the time to go into the settings of whatever you are using to make sure you are getting the best audio quality you can.
Once you have your recording we are going to use a free audio editing software program to polish the sound file you have, so we need to get that file isolated and into a format suitable for editing.
If you have recorded a voice track on your computer this is simple because you will already have a single audio file and most likely it will be in the .wav format that we need.
If you have used some other kind of system and do not have a .wav file then you can get a free audio converter here that will do the job, or just Google for one.
The point is that we need to get the file into the .wav format to get the best results.
Because we are going to edit the file and are also going to be adding that file back to a video project it is very important to stick to the .wav format.
If you are dealing with a voice track from one of your existing videos simply load the video into your video editing software then go to the output – sharing – distribute part of the program and choose to output the file as a .wav audio file.
One you have the sound file you will need another free software program called Audacity which you can download for free here: Download Audacity.
Just choose the version suitable for your system and install.
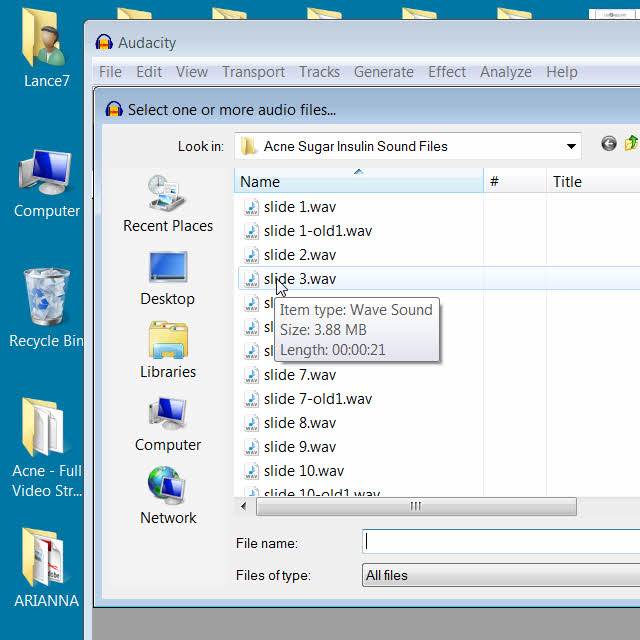
Now that we have Audacity installed, open the program and load your audio file by selecting “File” then “Open” and navigating to where you put the audio file.
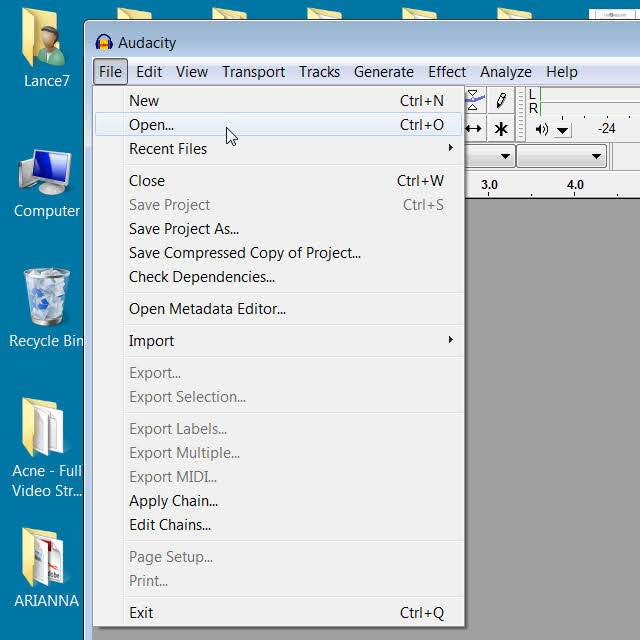
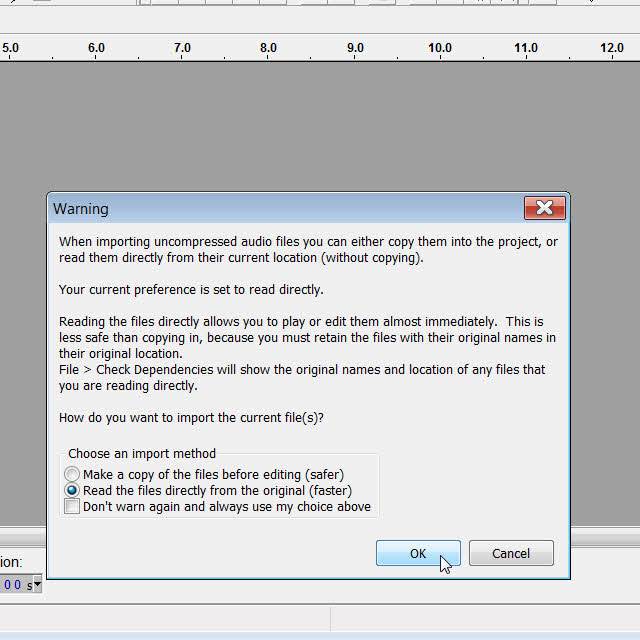
Audacity will give you the option of either directly editing the original file (faster) or making a copy of the file and editing the copy (safer).
My choice in this is to manually make a copy before I even start and place it in a separate folder.
That way I always have the original to go back to if I mess up and I am not getting Audacity to do anything extra that could lead to problems.
One more point to note before we get into the procedure is that Audacity is an incredible sound editing platform.
Although this simple guide will get your voice tracks up to speed it in no way taps into the vast capabilities of the program.
It would be worth anyone’s time to delve further into learning how to effectively use Audacity for all parts of your video soundtracks.
Cleaning Up Your Voice Track
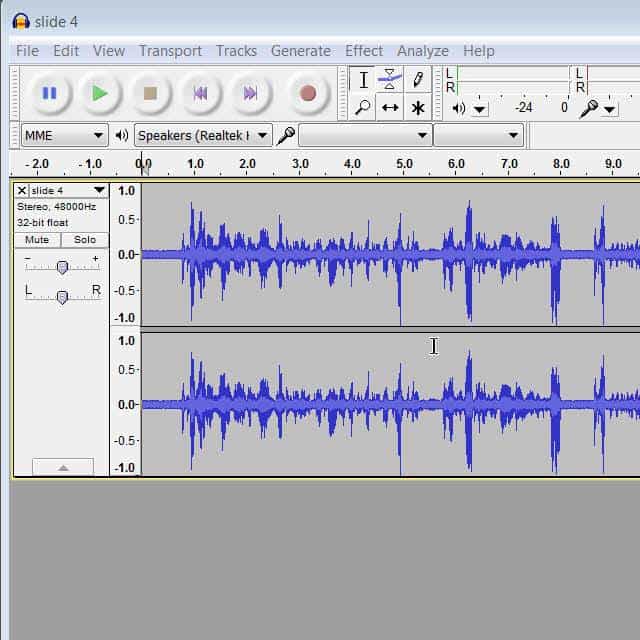
Once you have chosen the method of editing, the file will load into the program and be displayed as a waveform representing the sounds within the file.
Noise Removal
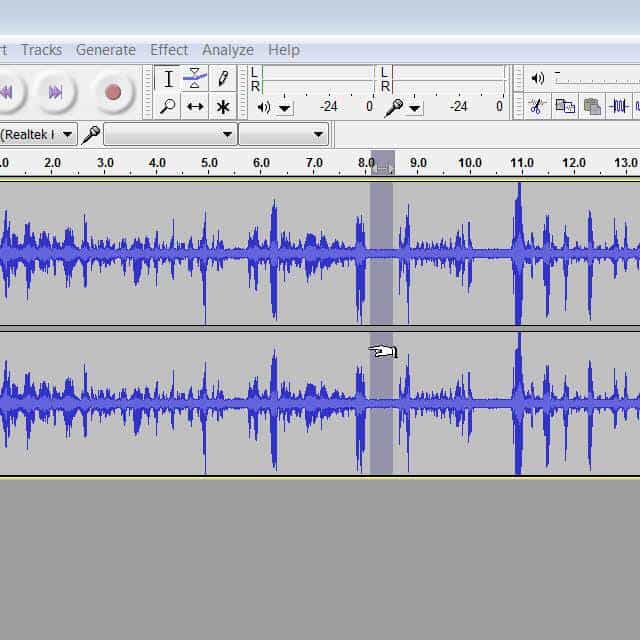
Before we start we need to find a small section of the voice track that has no vocals recorded on it.
We will use this section of the track to give Audacity a sample of the noise we want to remove.
In the example track I have used the mouse to select a portion of the file but very often there will be a silent “lead in” at the front of the audio file you could also use.
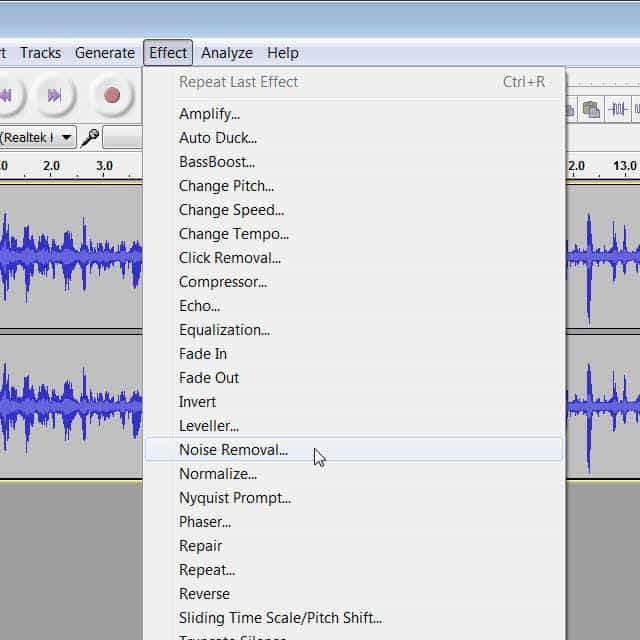
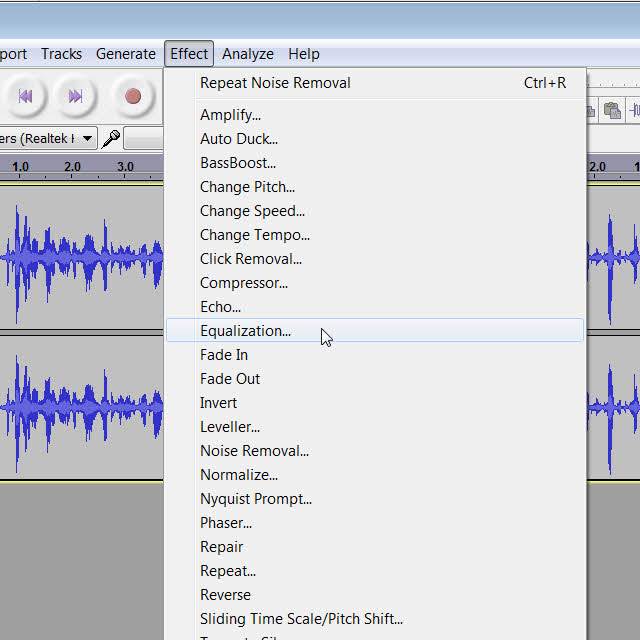
Now select Effect then Noise Reduction and a dialogue box will open.
In older versions of Audacity this was named Noise Removal as shown in the image below but it is basically the same function.
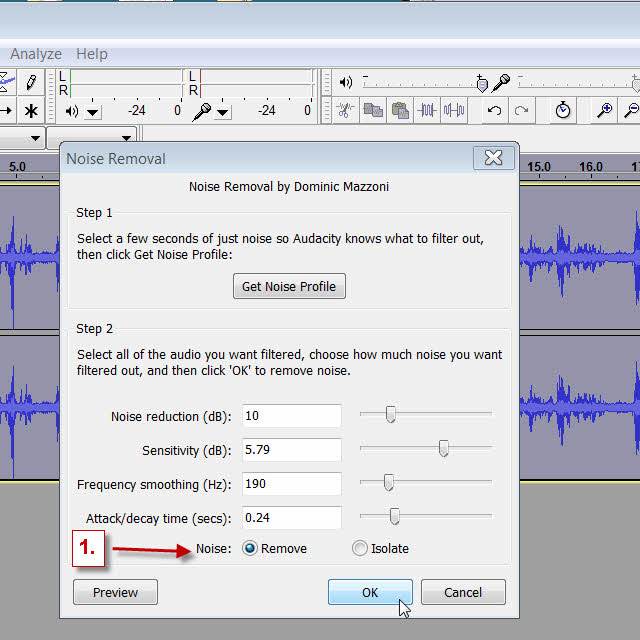
Click on Get Noise Profile and Audacity will capture and analyze the small sample you selected in the previous step.

The dialogue box will disappear and you will be back at the waveform view of your file.
Click anywhere on the waveform then either hit ctrl + A or use Edit / Select All to make sure the entire file is selected.
Now go back and select Effect, Noise Reduction again and the same dialogue box will open only this time, check the bottom of the box to see that (1.) Remove Noise is checked then hit OK.
Given that this is a “down’n’dirty” clean up there is no need to get into the other settings you can see in the image below.
The default settings will do just fine.
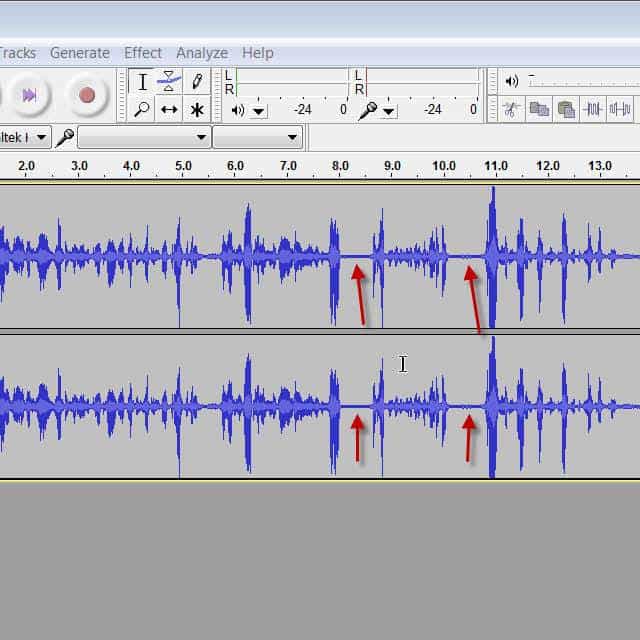
It will immediately run and you will notice that the areas where there were no vocals before have now become much thinner indicating the reduction in noise.
Equalization
Now that an acceptable level of noise has been removed you may find that the overall sound of the file has changed slightly.
It possibly has a “thinner” or more shallow sound to it but that doesn;t always happen.
This is because the noise removal also removes some other aspects of the file so we need to compensate for that with equalization.
First of all make sure the entire audio clip is selected by using ctrl + A or by using the Select All function under the Edit tab.
Go to Effect then select Equalization.
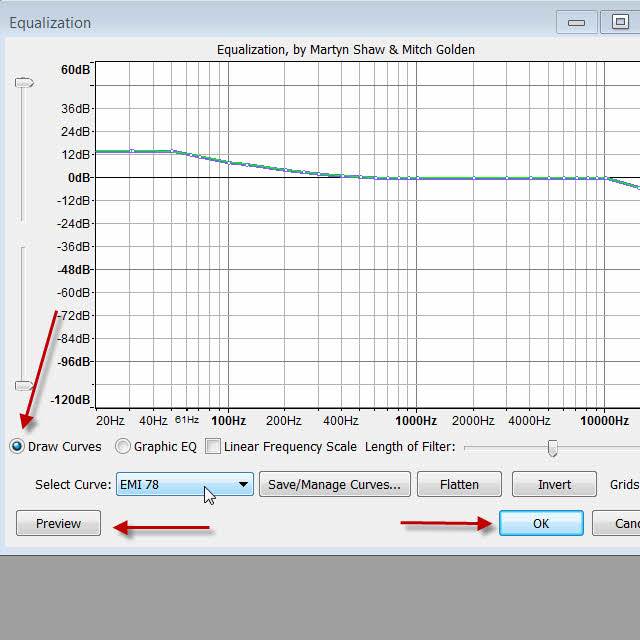
A new dialogue box will open shown below.
Make sure that Draw Curves is selected and then from the drop down box select EMI 78 as the profile you want to apply.
Bear in mind that some current copies of Audacity for some reason don’t have this equalization preset.
Perfectly acceptable alternatives that I have used are: Acoustic, Decca FFRR 78 and a few of the others.
You can use the preview button to listen to the change it will make so have a play with a few of them until you find one you like.
You can of course manually adjust the Eq by yourself but that kind of defeats the purpose of a “quick and dirt” fix!
Finally select OK once you have the setting you want and Audacity will apply the changes.
What you may now notice is that the small areas where you previously removed noise have now kind of fattened up a little because of the Eq changes.
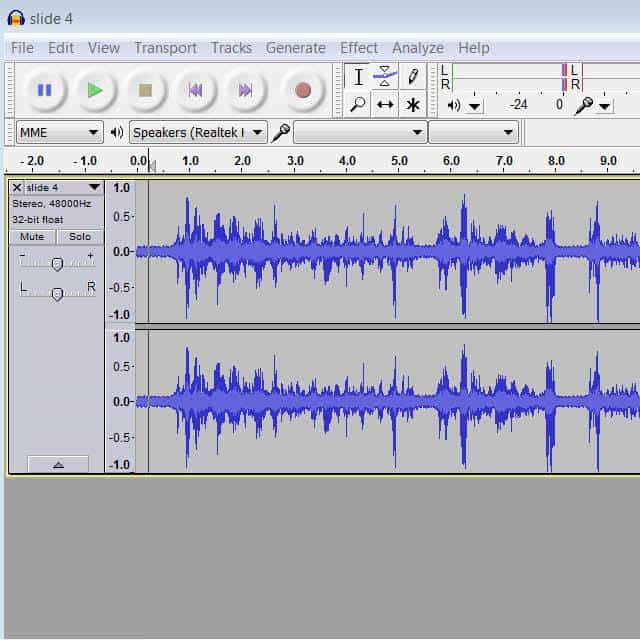
Take a listen to the final product and if it is ok then… OK!
If the Eq has raised the noise level to a noticeable degree then re-do the noise removal step once more for final clean and you should be done.
Hi. How do you take the edited audio file and place it back with the video?
Hi Mase,
Without knowing exactly what video editing software you are using I can only give a general description of the process.
You load the video on to the timeline of the video editing software.
You choose to “Export” the audio only to a new file.
You import that file into Audacity and go through the cleaning procedure as described on this page.
You save the changes (clean up) to the audio file and keep it somewhere you remember like the Desktop.
You go back into the video editing software with the original video loaded on the timeline and choose to “Mute” that video file.
You use the video editing software’s normal procedure for importing media assets into the library to import your cleaned file.
You add the cleaned audio file to the timeline aligned with the video track and then you are done.
hello i have an audio file from 1957 ….. voice is dull and heavy what to do ?
Is it a digital file?
This was super useful, thank you. It made all the difference to some a meeting recording with an annoying fan in the background, which made it hard to hear “through”.
Cheers,
Keith
Victoria, BC
Great! Glad it helped.