This FixVTS tutorial is specific to using that very small, free but incredibly powerful utility to automatically correct internal errors on a DVD.
These errors may cause any number of error messages to appear, all of which are quite meaningless.
You may get “invalid DVD navigation,” “disc error,” invalid DVD menu structure,” invalid DVD file structure” or a host of others.
If you are getting the “No Disc” error then it is more likely you have a DVD finalization problem or similar in which case you may be better off going back to the CD, DVD, Blu-ray Disc Repair and Data Recovery page of this site and going through the topics there.
Generally speaking the type of DVD error that Fix VTS will handle will be as a result of the reference files in the DVD (the IFO and BUP files), pointing to parts of the video files (VOB files) that are either in the wrong place or do not exist.
This can also cause jumpy or stuttering playback of the DVD or complete freezes while the player is desperately searching around for things that either don’t exist or have been marked as being in the wrong place.
To add further complication to all of this, that freezing or stuttering playback I just described could also be due to a dirty or scratched disc surface so check that out as well.
Preparation
The first step in the process is to click here and download Fix VTS.
It is a stand alone utility so there is no need to do any installation step. Just save it to a place on you computer and when you are ready double click the icon and Fix VTS will open.
Before getting started it is a good idea to create the working folder for the program first.
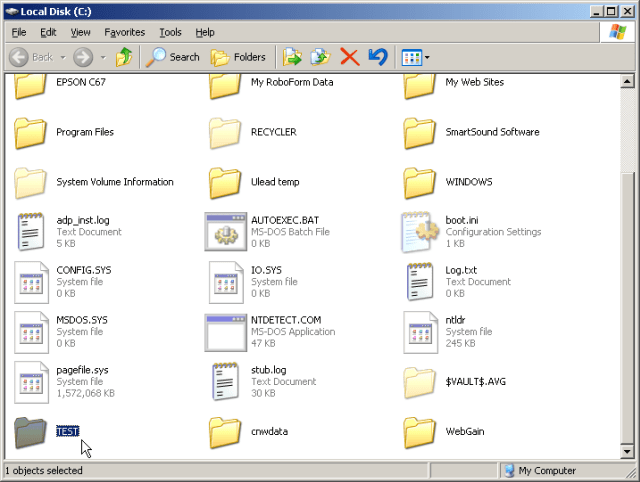
How and where you do this depends on your computer set-up but for the purposes of this demonstration I created a folder on my C drive called “test” as you can see below.
I will be importing/copying an entire DVD to be corrected into this folder.
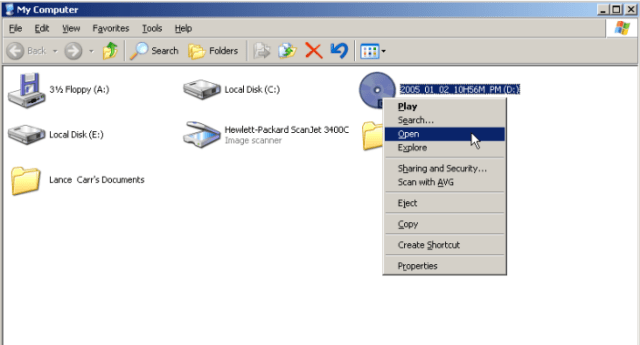
Place the problem DVD into the DVD tray of your computer and select to “Open” the disc.
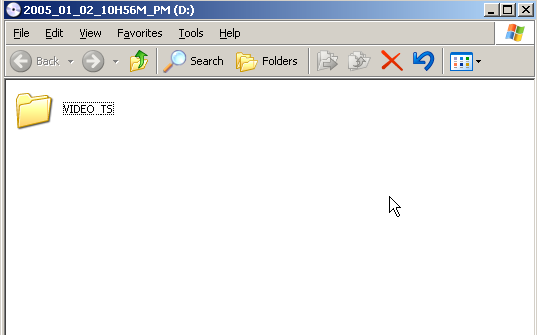
Depending on where the DVD came from you will now have a window open that shows the VIDEO_TS folder of the DVD.
Some DVDs may also have an AUDIO_TS folder as well but in 99% of cases there will be nothing in the folder.
If you do see an AUDIO_TS folder, open it to check it is empty.
Simply click and drag the VIDEO_TS folder from the DVD across to the folder you created earlier.
In this picture you can see I have dragged the VIDEO_TS folder from the DVD to the “Test” folder I created earlier.

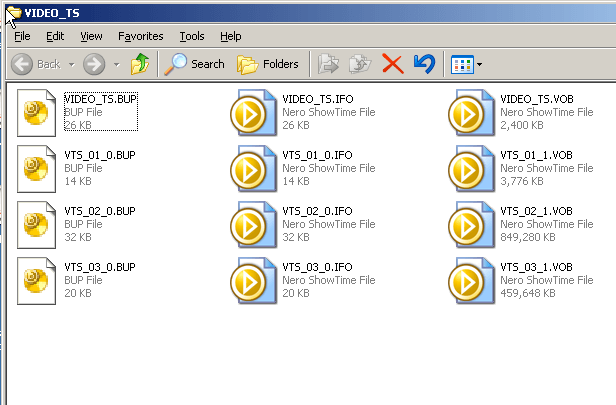
Once the copying process is complete you will have a VIDEO_TS folder on your hard drive. If you open that it will look as below.
Navigate to where you downloaded and saved the Fix VTS file and open Fix VTS.
As you can see it is a pretty simple set up.
I will get into its operation later but first notice the three check-boxes.
By default they will be as you see them here and you should leave them as is.
The first two boxes “Remove unref and blank cells” and “Fix wrong PGC LBA pointers” are the functions you want. Simply stated they refer to incorrect references to other things on the DVD or to things that are there but shouldn’t be.
The third checkbox is really up to you but I always leave it unchecked. If you check it then Fix VTS will correct the copy you have made on the computer.
There is no possibility that Fix VTS will do any harm, however I always choose to make a new corrected copy.
The reasoning for this is that if Fix VTS fails to correct the problem I still have the original and if I want to try some other software for correction I don’t have to go through the process of importing the entire DVD again.

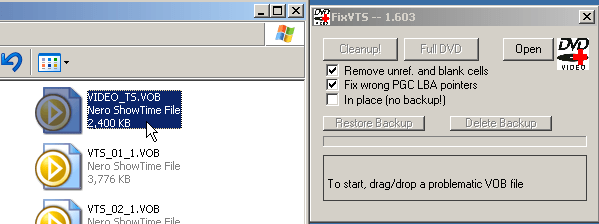
The next step is to get the DVD files into Fix VTS. There are two ways to do it. You can click on the “Open” button and navigate to the folder containing the DVD files or you can open the folder yourself and simply drag and drop the right file on to the Fix VTS window.
The file you are looking for is the “VIDEO_TS.VOB” file.
Either select it through the “Open” button and dialogue box or simply highlight it then drag and drop on to the Fix VTS window.
You will be able to tell that you have linked successfully because the “Cleanup!” and “Full DVD” buttons in the Fix VTS window will become active as you can see in the screenshot below.
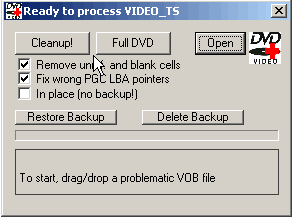
The difference between the “Cleanup” function and the “Full DVD” is quite simple.
The Cleanup button will only correct the particular .VOB file that you have chosen.
This option is really only for those who have an advanced knowledge of DVD files and structure and would know that a particular .VOB file has a problem.
You don’t need that one!
So, click the “Full DVD” button because that one is going to start with the file you chose but then it is going to process the entire contents of the DVD. You want that one so go ahead and give it a click!

Let the program run until you get the message shown in the screenshot below, “Done… End of Full DVD process.”
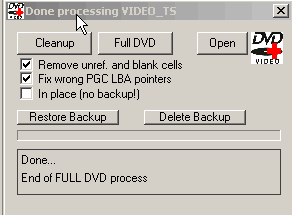
You will now notice there is a newly created folder in your original folder called “Fix VTSBackup.”
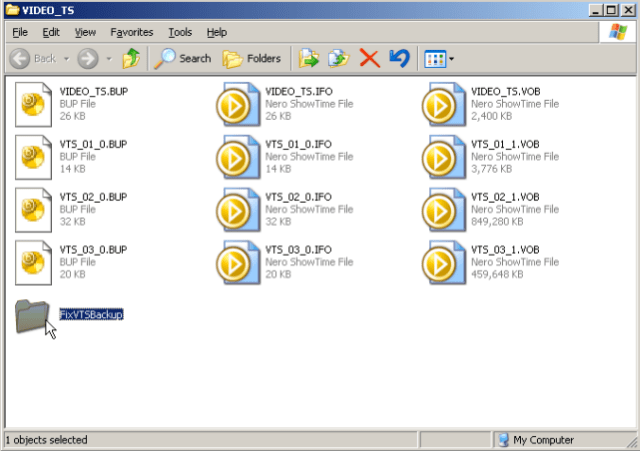
Open the FixVTSBackup folder and there are your newly created and (hopefully) corrected DVD files.
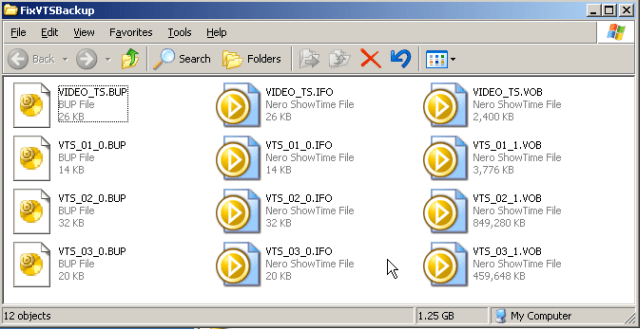
The entire FixVTSBackup folder can be moved and renamed VIDEO_TS if you want and then that folder can be burned on to a new blank DVD. Alternately you can use you favorite DVD Burning Software to create a new DVD.
Pop it in your player and see how it goes!
“Open the FixVTSBackup folder and there are your newly created and (hopefully) corrected DVD files”
actually it is where the original files go – you can test this by checking the dates on the files.
Hi
I am having trouble with a DVD, it freezes at the same points all the time. Sometimes the counter stops even before it freezes.
I am trying to fix the original structure of the DVD. I tried Fix vts in the past and it worked, but this time its not working by itself. Do you know if there is something else i can use as well, or perhaps I am using fixvts incorrectly?
Your help would be appreciated
Many thanks
Hi Ilya,
The fact that it keeps stopping at the same point each time suggests to me that the disc itself has a problem.
Check the surface of the disc by holding it up to a light to get a reflection to see if you can spot any little scratches or marks or even dirt anywhere.
Also check the data layer of the disc in good light to see if you can spot any inconsistencies or discoloration of the dye layer.
It may be a reading problem and not the actual data.