Sensors
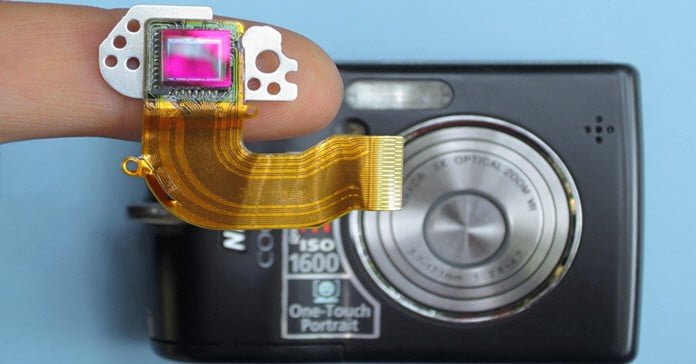
The sensor in the camera converts the light that comes in through the lens opening into a tiny electrical charge much in the same way as in a solar panel.
It then processes that tiny charge into an electronic signal that is accepted and digitally converted by the internal software of the camera (the Firmware) into a final image.
That final image is then stored on a memory card of some description as digital information.
In a still camera this is a single event, in a camera recording video this is a continuous event and the sequence of images that are captured is what we see as video.
Currently there are two types of sensors, the CCD (Charge Coupled Device) and the CMOS (Complementary Metal Oxide Semiconductor).
The CCD was the first type of sensor to be used and was until recently the most common one found in cameras.
In recent years the CMOS has begun to take over the market for a few reasons.
The CMOS sensors are cheaper to produce and use far less power than the original CCDs which makes them more suitable for more of the smaller devices available that have power consumption as an ever present problem.
Whilst the overall image quality is comparable to the CCD, the CMOS sensors are prone to one particular problem called Rolling Shutter.
Rolling shutter occurs because when the light hits the CMOS sensor the system scans from top to bottom to arrive at an image whereas a CCD sensor simply grabs the entire image in one go.
The result of this scanning strategy is that in shots where you are panning quickly some vertical objects can appear distorted and if you do it back and forth quickly, they can actually look like they are made of rubber!
This is by no means a deal breaker for any camera with a CMOS sensor.
Different products offer different solutions to this tendency.
The degree to which any camera is affected depends on the individual camera itself so make sure you look at reviews and see if anyone is identifying it as a problem with THAT particular model.
Bear in mind that most video editing software these days comes with a built-in rolling shutter correction tool.
Sensor Size
As you are wandering about the minefield that is the video camera market you will notice there are a variety of sensor sizes on offer.
But before we get to that we need to once and for all put the “megapixel” myth to rest.
Yes it is another of those “blind them with science” ploys coming out of the marketing department!
Let’s say we have a $200.00 point and shoot camera that offers 18 megapixels and we have a $3000.00 DSLR which also offer 18 megapixels.
Commonsense tells us that somehow the $3000.00 DSLR is going to outgun the point and shooter in video quality!
The real question is why?
For all intents and purposes the actual number of pixels is irrelevant; the important point is the size of the sensor.
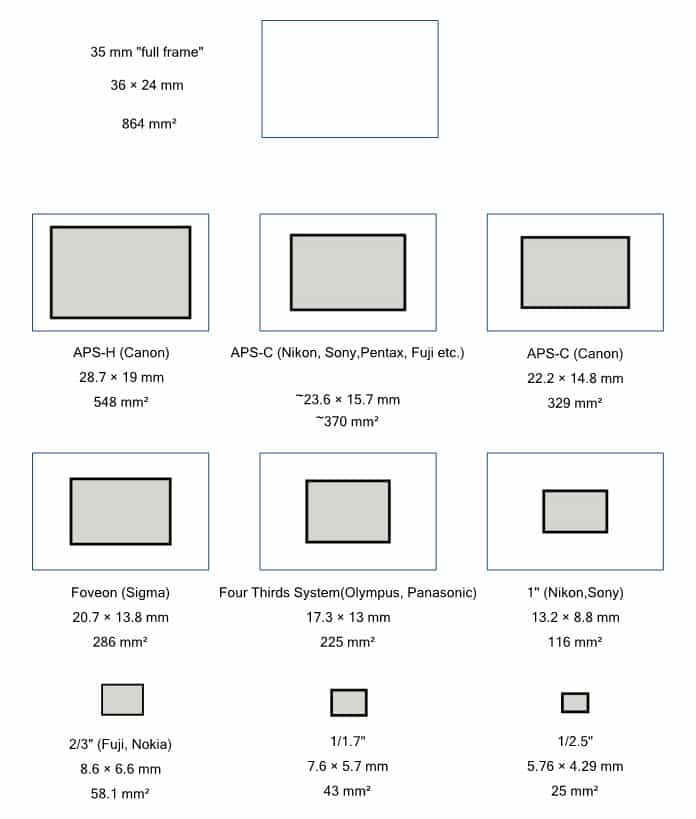
Our $3000.00 DSLR most likely has the sensor shown at the top of the diagram above (35mm “full frame”) and our point and shooter probably has the one right at the bottom on the right 1/2.5”.
Both have 18 megapixels meaning that the same number of pixels is covering a vastly different amount of sensor real estate.
This is achieved by each individual pixel being much larger on the DSLR than on the point and shooter and THAT is where the difference in quality comes from.
This is referred to as lower pixel density, as the same number of pixels have a larger area to occupy on an image sensor.
In simple terms, the bigger the sensor (and pixels on it), the better the quality.
The most common specifications you will see are shown in the diagram above with one final detail to look at and that is the “crop factor.”
The sensor’s crop factor describes how much smaller it is than the standard 35mm film format.
The crop factor affects a camera’s field of view, how much of the scene actually makes it on to the final video frame.
The same lens on a camera with a cropped sensor will have a smaller field of view than a camera with a full-frame sensor.
So what’s a person to do?
The reality is that full frame sensors are only going to appear in cameras at the top end of the market.
Those cameras will generally be much bigger in size, weight and ultimately price.
On this point you need to find a balance between the biggest sensor you can get your hands on, review information regarding all the features of the camera and most importantly, your budget.
Auto vs. Manual Controls
The subject of auto-controls and manual controls is a particular area that seems to attract much confusion mainly because of both the marketing aspect of how products are presented and the reviewing process.
Marketing tends to go into extremes of “this is awesome because it offers total manual control” and “this is awesome because it offers exceptional auto features.”
Either way it’s always awesome!
Reviewers add to the problem by having their own little “viewpoints” on whether or not auto or manual is desirable.
Reviewers are generally more experienced with the actions of shooting videos and can get a little “snobby” about auto features.
It is usually easy to spot a review that is somehow “looking down” on some camera because it has been designed with the point and shooter in mind.
There really is no way around this except for being aware of it as a potential bias the reviewer may or may not have.
The reality is that you would be hard pressed to find a camera suitable for shooting video that does NOT shoot in high definition these days.
Standard definition video is fast becoming a distant memory.
The nature of high definition is that it brings out ALL the details in whatever it is you are shooting.
Sounds pretty good really!
Unfortunately that also means that undesirable elements like poor lighting, differences in the white balance between shots, camera shake and especially out of focus are hugely amplified.
The way for you to disentangle all of this is pretty simple.
Access to manual controls and the ability to use them involves both a steep learning curve and the opportunity to practice using them over and over.
If this is the way you want to go then you need to look closely at how those controls are accessed and to what degree you can customize access to the common ones you will be using.
Manual controls generally only come into play when you have sufficient time to access them and get the camera set up for the shot you want.
This is only going to realistically happen in a professional or semi-professional setting.
In all other cases the most likely settings you will be using are the auto settings… turn it on, point and shoot.
Honestly look at what will be the most likely conditions under which you will be shooting.
Based on that, place your emphasis on manual or auto controls then check the existing reviews for an evaluation of them from that point of view.
Next in the series: Zoom, Low Light Performance and Lenses
Leave a Reply