How To Plan A YouTube Video – A Pre Production Process
Over the past month or so I have been helping a friend get started on YouTube by doing most of the video editing for her until she finds her feet and can operate by herself.
One thing that has become abundantly clear is just how vital being organized really is.
The sheer amount of wasted time in double handling steps and re-doing things has been quite an eye opener for me.
Most of these problems are ones that I have not personally experienced for years now so it is very interesting to see someone floundering about trying to make sense of it all.
She is on her 20th video so far and despite my constant reminders still does not really have a solid “process” by which she conceives then executes a video to completion.
Things are much better than they were but to a total newbie “finding the pattern” is not so easy.
I am pretty sure she is going to get it in the end but we still have a ways to go.
If you are still making your videos “on the fly” without any particular planning, chances are you are in the same boat and are working way harder than you need to.
Check out this video below for a good run through of a sample planning and execution process.
You don’t necessarily have to follow the same plan exactly but it is a good base from which you can set off.
How to Create Tutorial Videos Like a Pro
Putting together an effective tutorial video showing someone how to do something actually requires two skillsets.
The first and most obvious skill is that of what you are trying to tech in the video!
You have to have at least some grasp of the subject in order to help someone else to learn it.
The second set of skills is the one where most people tend to fall down and fail in teaching whatever it was they set out to teach.
That skill is the ability to put together a tutorial video that takes the learner from start to finish leaving them with newly acquired knowledge or a new ability.
I see lots of videos on YouTube where the person doing the tutorial obviously knows their stuff but are failing utterly in communicating that knowledge to anyone else.
There is a technology of doing this and if your interest is in creating tutorials of any kind then this video is well worth taking a look at.
Wondershare Filmora X V.10.5 Update
This is the official video from Wondershare covering the most recent update to the Windows version of Filmora X.
Probably most notable amongst them are the improved Audio Effects now available and the AI Stickers which allow you to add “Instagram” type filters to videos automatically.
They have also included a new tool called Auto Reframe which allows you to take existing footage and reframe it to a different aspect ratio.
This is especially handy if you are converting some 16:9 footage you shot for YouTube to 9:16 for Instagram.
It uses tracking technology to retain focus on the subject within the reframe.
More Camera Movements
Carrying on from last weeks videos covering some basic camera movements this week we have the Zoom and the Pedestal.
As I mentioned last week I like these one because instead of briefly stating what each type of shot is, they go into far more detail.
The Zoom
The Pedestal (Up and Down)
Cinematic Character Introduction Freeze Effect – PowerDirector Tutorial
I have added tutorials like this before and from memory I think it was a Filmora one originally.
In this video we take a look at basically the same effect but approach it with a little more sophistication.
The reason for that is because PowerDirector offers that little extra control over the process.
If you are not sure about what the effect is, it is the one where there is a freeze frame as a new character is introduced usually with some text graphics explaining it.
It was used in all the “Ocean’s” movies as well as in Snatch.
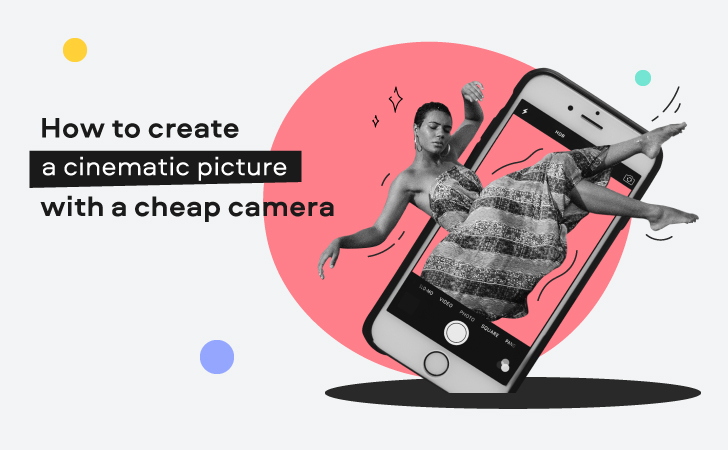
Create a Cinematic Image with a Cheap Camera or Phone
There are lots of tips and tricks around on the internet for taking better shots or videos with lower end equipment.
However I came across this rather long article on the Movavi site this week that covers just about everything you need to know to all in one place.
5 SECRETS To Cinematic Sound Design
All of these tips are pulled off in Adobe After Effects but that’s irrelevant to the process.
None of them are difficult or complicated in any way and none of them require any kind of industrial strength software.
They are however some very good ideas and very easy to execute although throughout the video the guys keep plugging an audio product.
I think that’s fair because the tips are good.
Obviously it helps of the video editing software you are using has at least decent audio handling capabilities.
Personally I tend to use Pinnacle Studio when my audio design is getting a little busy!
5 Tips to Stop Jacking Up Your Timeline – CyberLink PowerDirector 19
This one is definitely not just for PowerDirector!
Lots of times especially on bigger projects you can be adding things to the timeline or deleting them and suddenly realize everything else on the same track has shifted.
In the video below Maliek covers a few things in PowerDirector that you can set up so that this doesn’t happen.
Outside of PowerDirector the same rules apply.
What you need to look for are settings that change the way things already on the timeline behave when other things are added.
How Easy is PowerDirector to Use? Watch This Demonstration to Find Out
Jeff Sibelius hasn’t really been producing many videos recently so I was pleased to see a new one from him pop up in my feed this week.
He is one of the main sources of tutorials for CyberLink PowerDirector that I use but his emphasis has shifted more towards Drones than video editing software recently.
This week’s video is very good because it is of Jeff starting up and completing an editing project in PowerDirector.
In the video he explains each step then fully covers the relevant tools or interface features that apply to that step before moving on.
It is a great look at how a modern video editor is laid out and how it all works.
PowerDirector – Emulate a Motion Graphic Title with Title Designer
CyberLink PowerDirector comes with a pretty extensive library of motion graphics which can then be further adjusted in appearance and in terms of motion behavior.
The reason they include so many is that manually building motion graphics like these is very time consuming and requires a lot of keyframing and general futzing about!
So, in the two videos below the Sharper Turtle has done a complete walk through of how to do this!
Surely this is the tutorial that absolutely no-one ever asked for!
Part One
Part Two
How I filmed a Car Commercial with Only 50 Dollars Budget
OK there is a lot of fluff, pointless verbiage and general time wasting in this video before we get to the actual meat and potatoes!
So let’s get that out of the way first and feel free to jump ahead to the good stuff!
Once you get there he offers some good tips but lord he seems to think he and his life is fascinating!
By the way, for a Pro his sound levels are a disaster going up and down like a yoyo!
Another of my pet hates!
YouTube Shorts: A Complete Guide
In reply to the popularity of TikTok and Instagram videos YouTube came up with Shorts.
As is usually the case with YouTube they went to great lengths to explain what Shorts are, what they are for and what the requirements are for something to be considered a Short!
As is also usually the case everyone read those articles and ended up having really no idea what the hell they were talking about!
So fortunately for you and I Justin Brown from Primal Video has made a video to demystify it all.
These Videos Can get Your Channel Banned
There are some clearly written documents on the YouTube website that lay out exactly what is acceptable and what is not acceptable when it comes to uploading videos.
However there are also some other areas you can get yourself into trouble because it requires an understanding of those rules as applied to certain situations.
In the video below they cover some of the more “unwritten” types of things that can get you into trouble on YouTube.
Leave a Reply