• Skip to main content
  • Skip to secondary menu
  • Skip to primary sidebar
  • Skip to footer

The DIY Video Editor

  • Blog
  • Reviews
  • How to Choose an Editor
  • Choosing a Video Camera
  • Editing Tips
  • Shooting Tips
  • Sharing & Distribution Tips
  • General Tips
  • Video Courses
  • Audio Tips
  • Optical Discs
  • Quick Video Tips
You are here: Home / Software Reviews / CyberLink PowerDirector 19 Review – Editing to Sharing

CyberLink PowerDirector 19 Review – Editing to Sharing

PowerDirector 19 product range box shots.

Now that we have all the shiny new stuff out of the way let’s get into CyberLink PowerDirector 19 review for real.

Before we go any further I must make a point that you need to keep in mind regarding just about any top end consumer video editor these days.

We are no longer looking at software that just imports video, edits it with maybe some basic effects and then burns it to a disc or creates a file you can upload to YouTube.

The current batch of editors like PowerDirector are jam packed full of features and if I am going to be honest (and I am… just in case you were wondering), most modern video editing packages of the caliber of PowerDirector 19 would take pages and pages of text to go through all their features one by one.

The full user manual for this program is over 470 pages long because that’s what it takes to cover every detail of every feature PowerDirector 19.

All you really need to know is that this program has just about everything you would ever need to produce high quality videos at home.

All the core editing tools you would expect are here including frame accurate cutting, image cropping, reverse video, video speed control, overlays, transitions, filters and on and on.

Seriously, if this software doesn’t have it then you can be pretty certain no-one else has it either.

It has space for 100 tracks in the working area allowing you to overlay as many layers of video, audio, effects, titles, subtitles and heaven knows what else you may want to pile on there as you want!

If that’s not enough then I have no idea what it is you are trying to do and if you did manage to fill them all I dread to think what it would look like when you had finished!

Getting Started with CyberLink PowerDirector 19

The program opens up by offering a Multi-Mode Start Up screen that gives you the choice of going into Full Mode, Storyboard Mode, the Slideshow Creator or Auto Mode.

Here you can also choose the aspect ratio of your project (note the new 1:1 aspect ratio for social media footage.) although there is a handy button on the user interface that you can also use later to set the aspect ratio.

If you are always going to be using the full editor you can also check the box on the bottom to skip this screen in the future.
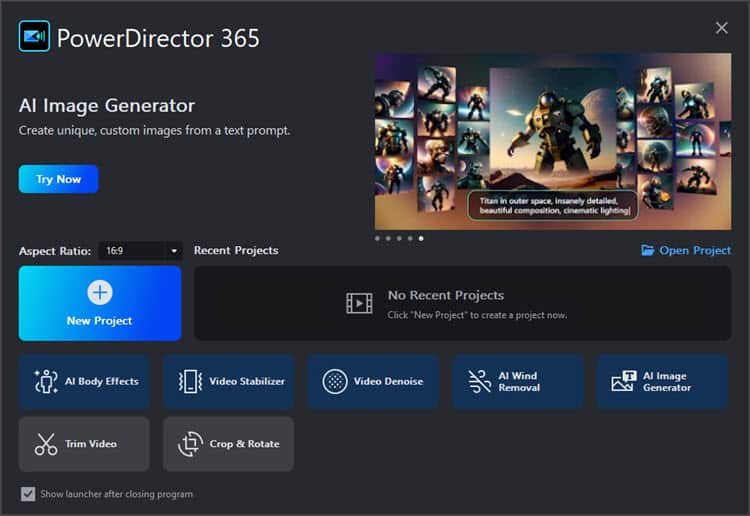
With both the Full Mode and Storyboard Mode you enter the full editing module and can perform every function and use every feature that is available in each version of the program.

From within either of these you can then switch to a 360º project.

The Auto Mode allows those who are new to the editing process (or those that are really not that interested!) to follow a simple wizard based interface to add their videos, photos and audio and semi-automatically have it all output to a final product.

The Slideshow Creator is pretty self explanatory and operates as a separate editing module designed specifically for that purpose.

Regardless of which module you go into at first you can always switch from one module to another at any time in the editing process from within whatever module you are already in.

Editing Features

Whilst this could go on forever here are some of the highlights and keep in mind I haven’t listed most of the new features here as they have already been covered on the previous page:

Frame Accurate Editing

Frame accurate editing allows you to get down to the “frame-by-frame” level of a file ensuring that your edits are executed with absolute precision.

The “frame accuracy” doesn’t just apply to where you happen to be making cuts or beginning and ending clips.

It also applies to the use of transitions, filters, effects and overlaying other clips or objects.

It allows you total control over any aspect of the editing process.

Motion Tracking

This is a dedicated module that allows you to track motion by matching image data from a selected area in a frame to image data in each succeeding frame.

You can isolate an object and accurately track its movements automatically and then use the “motion path” that has been created to attach other objects to it.

You can also use the motion path created to add objects like arrows, labels, speech bubbles or any other image file to “follow” the selected item around as the video plays.

That same motion path can also be used to apply effects, change the color of the video selection or portions of it, enhance the color or apply filters.

Here’s a demo of it:

Customizable Design Tools

There are a number of standard tools that form part of most video editing software programs these days.

CyberLink have taken these most commonly used ones and created kind of mini-programs around them so that instead of having to use preset features they can be fully customized and saved for later use. They are:

Transition Designer

Can be used to either redesign an existing transition or to create your own unique transition from any logo or image file you may have.

Title Designer

Beyond the usual ability in most title modules like backgrounds and fonts, PowerDirector allows you to add motion, gradient color, border, blur level, transparency and reflection.

PiP Designer

This can be used to overlay animated objects on your videos and use simple transforming tools.

Theme Designer

Create animated slideshows by just adding your own assets to the existing templates.

MultiCam Designer

A specialized tool to overcome the difficulties presented by footage from different sources.

It assists in syncing all the footage together and allows a “switching” type of editing process to put a project together.

This can be used to sync and switch between up to four video sources on the fly but if you want to use it for PiP type collages it will go up to 100 tracks.

Menu Designer

Allows you to create fully customizable disc menu layouts, menu structures, font styles and chapter points for disc projects.

Mask Designer

powerdirector-17-mask-designer screen shot

This module separates out the concept of adding masks to an existing video on the timeline and raises it to a new level.

Masks themselves can be used to overlay an existing video on the timeline.

They can be used to change the appearance of the underlying video or just a part of it and are one of the things you can attach to a motion path as mentioned previously.

Usually editing software at this level will offer a set of commonly used masks with reference to their shape and what you can have them do.

In PD 19 this is not the case with it now having a dedicated designer you can use to create your own custom made masks.

Subtitle Room

Subtitling is not just for foreign languages and can also include the creation of closed caption type displays in your projects.

Something (especially with kids) in the audio may be a little unclear so a subtitle can really help.

PowerDirector’s dedicated Subtitling module makes this usually tedious task very straightforward and a whole lot less painful.

Video Blending

OK this one is kind of hard to explain but simply put it allows you to vary the way clips, filters or effects are displayed on the video you are working on by choosing a different setting.

Each of these settings, Normal, Darken, Multiply, Lighten, Screen, Overlay, Difference or Hue give you a different result in how the overlaid video appears in the final product.

This is another feature that offers control over the way the video looks and behaves resulting in special effects that aren’t just run of the mill “canned” effects.

Screen Recorder

Let’s be honest here, a good quality screen recording program with full editing capability and all the bells and whistles will set you back around $300.

PowerDirector 19 comes with its own integrated screen recorder so you can record whatever you are doing on your computer screen to make DIY videos, demo videos or record game play.

You can record the system audio at the same time as well as a running commentary then have the video file that is created saved or sent directly to PowerDirector for editing.

The recorder runs as a standalone program so you can use the PowerDirector screen recorder to record video of you using PowerDirector!

You can capture everything on the screen as it is happening, a specific application only, or a custom section of your screen in either 16:9 or 4:3 aspect ratio, as well as highlight mouse clicks in a range of colors.

Chroma-Key

This has been a feature of PowerDirector since I can remember and is a well developed part of the overall program.

Bear in mind that good chroma-key starts with shooting the footage correctly but the included capabilities of the chroma-key feature are quite excellent.

PowerDirector 19 stands out from the crowd with this module in that it offers more than one “key” that you can use to key out backgrounds.

Content-Aware Editing

Pretty cool feature really, it can scan and analyze your footage and detect scenes, faces etc to make scene selection easier.

Another aspect to it is that it can also identify scenes that seem to be visually incorrect, imbalanced or have some kind of error.

Once that has been done those scenes can be automatically sent to the appropriate correction tools (Magic Tools) for re-processing.

By the way, the Magic Tools are yet another complete set of automated tools for correcting video, images and sound files.

Action Camera Center

powerdirector17-action-cam-center screen shot.

The Action Camera Center is a purpose built video editing toolkit which gathers into one place all the most common tools needed for editing this type of footage.

It has direct access to fish-eye distortion and stabilization filters as well as the most commonly used effects for these types of projects.

This year they have added the ability to create stop motion clips and some quite advanced “pan and zoom” effects.

Pro-Quality Video Effects

There are around 500 special effects available across the various modules of the program.

All of these can be customized to perform exactly the way you want them to and your adjustments can be saved as presets to be used over again.

By the time you add the ProDad tools included as well, I just cannot imagine what else you could possibly want!

Paint Animations and Time Lapse

The program has ability to add Paint Animations to your projects and a tool for either creating or dealing with time lapse videos.

This tool can also be used to create stop motion videos as well which is accessible through the editor interface or the Action Cam module.

Effective Library

The library is hardly the sexiest of features but believe me, it is vital.

It takes little to no time at all to find yourself drowning in a sea of video clips, audio clips and images from old projects, incomplete projects and stuff you have been meaning to get to for a while!

If all that stuff does not start out being stored in an orderly manner then you will be lost before you know it.

The PowerDirector 17 library provides easy access to a well organized library for the sorting and storage of all your assets broken into various sub-headings such as video, audio, images etc.

It also offers the ability to add “keywords” to your assets so that finding or retrieving files can occur quickly and efficiently.

Import/Export High Frame Rate Video

In response to the proliferation of action type cams that are dominating the market at the moment I think it was last year that CyberLink added this.

Most action type cams can capture high definition footage at very high frame rates with the purpose of this footage being played back in slow motion without losing any quality.

PowerDirector 16 can import, edit and render out these files at the same high frame rate they were taken at.

Beat Marker

Analyzes any music track you have on the time line and places visual markers at the points of the beat of the music.

At face value that hardly sounds world changing but when put into use it is a hugely useful tool.

One of the most powerful ways of creating an effect on your audience is by having the visuals of your production match the music. When you can get your cuts right on the beat of the music this effect is magnified.

One of the most tedious processes of editing at this level is getting those cuts synced with the music just right.

Up until now you generally had to rely on looking at the waveform of the audio file to take a stab at getting it in the correct place and even then every cut could take a few tries.

The Beat Marker takes all the guesswork out of that process by providing a clear marker as to exactly where the beat is falling.

Sound Normalization

A one click solution to making a final adjustment to your project’s audio file which ensures a constant volume level throughout.

3D Editing

Of the current crop of consumer level video editors offering 3D editing and features PowerDirector 19 still appears to be one of the best in its class.

This is mainly due to the rendering abilities I have already mentioned earlier so although I have no particular use for it, if you do, then PowerDirector 19 is about as good as it gets at this point in time.

The program provides for a complete end to end 3D workflow and can handle all current 3D input and output formats as well as 2D to 3D conversions.

Input / Output, Sharing and Distribution

It used to be that in a review you could quite easily name the input files the software can handle as well as the output files and methods.

These days the list is endless!

As far as I can see you can safely assume PowerDirector 17 handles just about every video, audio and image file you can imagine and the same goes for output!

You can check out the full list of System Requirements & File Format Support here: PowerDirector System Requirements and Specs

For sharing online you can upload directly to YouTube, FaceBook Vimeo and DailyMotion and  for YouTube it also supports direct uploading of 3D and 360º files.

TrueVelocity Engine

True Velocity is a technology developed by CyberLink and is one of the features that helps it stand out from the crowd although it’s not really all that sexy!

It is their own software code that enables the software to more efficiently muster the resources of whatever computer it is housed on.

Simply put it is a system of working out what processing is available, where it is and how to use it more effectively.

It really comes into its own on 64bit machines but you don’t necessarily lose out is you are on a 32bit one.

The real value of True Velocity is a smoother and faster experience when you are rendering your projects or previewing the timeline.

Version 7 of True Velocity is the latest update of this feature.

DirectorZone, Learning Center and Forum

Finally I need to mention a feature of PowerDirector that is not actually part of the software itself but brings immense value to it.

CyberLink has had two active online communities for quite some time now in the form of a dedicated portal called DirectorZone and their CyberLink user forum.

DirectorZone as of last year had around 400,000 individual customized effects, Projects templates, objects, frames, menus and all sorts of other stuff created and uploaded to share by users.

It also contains about one hundred detailed video tutorials showing you how to use PowerDirector to do all kinds of different things as well as what are called Timelines.

Their forum is both active and extremely well run with a wide number of people with varying interests and levels of expertise ready to share and help each other.

And finally something new they added this year was a dedicated learning website called Learning Center that has hundreds of tutorial videos laid out in a logical sequence to get you started and on to more advanced editing in short order.

CyberLink PowerDirector 19 Summary

In my opinion CyberLink PowerDirector 19 is clearly as good as it gets as far as consumer level video editing software goes at this point in time.

In fact to call it “consumer level” is too wildly understate the program’s capabilities.

It’s not just good because it has “a bunch of cool stuff” in it. It is good because CyberLink continue to try really hard to make it that way.

They very clearly seem to follow a development philosophy of how to make the software better from the user’s point of view rather than from a sales point of view which results in each version being better than the last.

If you are looking for a fully loaded video editor with everything you need to create your video projects from the very basic through to a special effects masterpiece you would be well served by this program now and well into the future.

Click Here to See CyberLink PowerDirector 19 for Yourself

Previous Page: CyberLink PowerDirector 19 Review Part 1

5 / 5 stars     
Previous Post: « 9 Essential Cuts Every Video Editor Needs to Know
Next Post: How to Make Lower Thirds Like a Pro »

Reader Interactions

Comments

    Leave a Reply Cancel reply

    Your email address will not be published. Required fields are marked *

    I accept the Privacy Policy

  1. Dalton Meyers says

    20/02/2020 at 5:08 pm

    Powerdirector 18 ultra wont upload videos to youtube. SO there’s that…

    Reply
    • Lance Carr says

      21/02/2020 at 12:20 am

      Well sort of…
      Google recently changed a bunch of stuff regarding signing in to Google services like YouTube from 3rd party software like PowerDirector.
      This has affected just about every brand of video editing software that (used to!) offer the direct upload method from within the software, so it is not a “CyberLink” problem exclusively.
      Apparently CyberLink and a bunch of other companies are currently in discussions with Google to work out a solution to the situation.
      That means that for the moment, you have to render a final file then upload manually using the YouTube uploader.

      Reply
  2. John Clarkson says

    01/12/2018 at 1:47 pm

    What is the best method to record greenscreen videos? Do clothing colours, eye colour and hair colour make a difference for noise? Is it best to use a .mov or convert it to a mp4 before editing? My video seems a bit rough around the edges of the person. I am using Pd17.

    Reply
    • Lance Carr says

      02/12/2018 at 3:37 am

      Hi John,
      As you are probably beginning to suspect, there is more to that green screen stuff than meets the eye!

      For all the answers I think you will probably ever need go to this blog post linked below and about half way down the page is a video I consider to be the ultimate green screen tutorial.

      It covers the entire subject from soup to nuts.

      After you have digested that then go to YouTube and search for “PowerDirector University green screen” and on that channel you will find a couple of tutorial directly addressing green screen in PowerDirector.

      Just bear in mind that 90% of green screen is in the shooting, not the post production.
      https://diyvideoeditor.com/the-friday-roundup-frame-rates-green-screen-and-pip-tutorials/

      Reply
  3. Berry says

    14/05/2018 at 7:45 am

    Hi Lance,
    I am using PD 16 ultra.My concern is once I use color match for a selected clip I am unable to use crop and zoom for the same clip.Is it that it’s not possible to do both at a time for the same clip?

    Reply
    • Lance Carr says

      15/05/2018 at 1:20 am

      Hi Berry,
      OK, so I opened PD16, added two clips to the timeline then Color Matched them.
      I used Clip 2 so as to adjust the color of Clip 1.
      I then selected Clip 1 and went to Power Tools then Crop and Zoom.
      When I selected Crop and Zoom PD warned me that any effects would not show in that Crop and Zoom Module.
      I applied a couple of key-frames with a Crop and Zoom but remember, because that module does not show the applied Color Match the preview window shows the original unchanged clip.
      As soon as I applied the Crop and Zoom the module closed and on the timeline the clip now had both the Crop and Zoom and the original Color Matching applied.
      Possibly you may heave been fooled by that warning about not applying existing effects but that only means that those effects are cancelled while you are in the Crop and Zoom module.
      As soon as you apply, everything returns to how you had it before.
      If this doesn’t accurately describe the problem you may want to apply the crop and zoom effect first THEN do the color match and see how that goes.
      Get back to me so we can put this to bed!

      Reply
  4. Don says

    18/09/2017 at 5:59 pm

    Hi Lance

    You certainly know your stuff. I am on the verge of buying PD15 as a result of your review, but have to ask. Is there any news of PD16 on the horizon?

    Reply
    • Lance Carr says

      19/09/2017 at 1:54 am

      Hi Don,
      Thanks for the kind words.
      The PowerDirector upgrade cycle (from memory!) seems to fall some time in September which means it should be about now!
      However I have received nothing from them so far regarding PD16.

      Reply
      • Don says

        19/09/2017 at 4:45 am

        Thank you for your reply. I was hoping the rumour mill was in full swing as often happens with Nikon. Actually, PD15 is a fairly well established piece of software at the moment and I am guessing most of the bugs have been ironed out. Perhaps I shall wait for PD16 to go through its birth pains before I buy it. PD15 it is!

        Reply
        • Don says

          19/09/2017 at 5:00 am

          I just went to Cyberlink to check out prices and offers and lo and behold PD16 is on sale! I shall read around a bit I think to see if there are any reviews.

          Reply
          • Lance Carr says

            19/09/2017 at 6:16 am

            Hi Don,
            So right in the middle of all this I just received an email from CyberLink announcing the PD16 release!
            In answer to your question regarding a review…. gimme a break here, I only just found out myself! Hehe!
            Personally speaking I have just had a quick look at the new features and it is basically an enhancement upgrade rather than some kind of drastic rewrite of the program so you should be fine with it.

  5. Prizm says

    21/08/2017 at 8:12 am

    I have tried a number of PowerDirector versions over recent years, and every time it lets me down:
    – The playback cursor is choppy and is not smooth scrolling like other editors, which gives a poor indication of timing.
    – That horrible flower preview in the Effects tab, and the A/B preview in the Transitions are a choppy, frame-dropping, embarrassing mess. And unbelievably, they still haven’t improved these preview animations in PD15.
    – When opening the Titler, it won’t display the current background where your playback cursor is. It seems to only display the first frame where the title starts on the timeline. This is a real pain when trying to determine the best place to put your titles.

    A couple versions ago, audio keyframes were clunky to lay down, and volume was not even measured in dB, it was just a numerical value. Oh, and mousewheel-zooming on the audio track would cause the waveform to disappear. I think many of these audio-related issues have improved though.

    I wonder if the other issues will improve with PowerDirector 16.

    Reply
    • Lance Carr says

      22/08/2017 at 6:01 am

      Hi Prizm,
      Has it ever occurred to you that your problem is not with the software?

      Just about everything you are describing here points directly to a computer that is woefully underpowered for what you are asking it to do.

      PowerDirector or any other editing software for that matter doesn’t actually DO anything itself.

      It tells the computer what to do and if the computer is not up to the task then everything falls over.

      Reply
  6. John Dust says

    04/08/2017 at 8:03 pm

    Is there a way to carry over Transitions from PD10 to PD15. I have worked up from PD8 to 15 now, but still start my work in PD10 because of numerous old transitions I like that have disappeared in later versions. Thanks.

    Reply
    • Lance Carr says

      05/08/2017 at 7:30 am

      Hi John,
      That’s a good question totally deserving of an answer!
      Wish I had one!
      The “canned” transitions obviously just carry forward so I am assuming you mean the one you have either created or adjusted and saved as presets.
      I am not sure how the program actually stores these.
      Why not head over to the CyberLink User forum and ask there?
      Much smarter people over there when it comes to these more obscure questions.

      Reply
    • Petermay says

      09/11/2017 at 6:46 am

      If you have downloaded transitions, copy and paste them in the ‘Transitions’ folder inside the installation directory.
      Similarly for your own created transitions, you must have saved them in a folder of your own or if you are still running PD 10 copy all the transitions from the install directory of PD 10 and save them. Install PD 15 and copy the saved transitions to the ‘Transitions’ folder of new installation directory.
      Basically all elements of PD can thus be carried over to newer versions. I have a lot of Styles carried over from PD 9, 10 … to PD 15 this way.
      Hope this helps.

      Reply
      • Lance Carr says

        09/11/2017 at 7:00 am

        It certainly does help Peter and thanks for taking the time to share your knowledge!

        Reply
  7. Ian F says

    19/07/2017 at 5:55 am

    Hi Lance,

    Having issues importing an AVI file from a folder into PD 15. I’m using the “Import Media” button – I have an error message – An error occurred while opening this media file in the media library. It may be because the file is broken, an unsupported format, protected video content, or for another reason.

    I’m running windows 10 64 bit.
    Any Ideas

    Ian

    Reply
    • Lance Carr says

      19/07/2017 at 6:32 am

      Hi Ian,
      First up go to this address, download and install MediaInfo.
      It’s a small program that gives more detailed info on different media types.
      It’s on SourceForge so it is spam virus free etc.
      https://sourceforge.net/projects/mediainfo/
      Once it is installed, right click on the offending file and choose MediaInfo.
      When it opens go to View and select Tree.
      Take a look through the info to see if there is anything strange about the file.
      If you are not sure just post the full details back here and I’ll take a look.
      Just to be clear here, the .avi file extension (the last time I checked) covers about 600 different video and audio codecs for the production of video.
      There is the possibility that the codec that produced the file and gave it the .avi extension is a bit… exotic?
      Get back to me.

      Reply
      • Ian F says

        19/07/2017 at 7:31 am

        HI Lance, Really appreciate getting back to me so quick. I have sent the info to you from the medialinfo in text format.

        General
        Complete name : C:\Users\fish2\Documents\CyberLink\PowerDirector\15.0\Imput\15 May 2016 – 11 Sept 2016.avi
        Format : AVI
        Format/Info : Audio Video Interleave
        Commercial name : DVCPRO
        Format profile : OpenDML
        File size : 11.4 GiB
        Duration : 56 min 22 s
        Overall bit rate mode : Constant
        Overall bit rate : 28.9 Mb/s
        Recorded date : 2016-09-11 15:52:30.000

        Video
        ID : 0
        Format : DV
        Commercial name : DVCPRO
        Duration : 56 min 22 s
        Bit rate mode : Constant
        Bit rate : 24.4 Mb/s
        Encoded bit rate : 28.8 Mb/s
        Width : 720 pixels
        Height : 576 pixels
        Display aspect ratio : 4:3
        Frame rate mode : Constant
        Frame rate : 25.000 FPS
        Standard : PAL
        Chroma subsampling : 4:2:0
        Bit depth : 8 bits
        Scan type : Interlaced
        Scan order : Bottom Field First
        Compression mode : Lossy
        Bits/(Pixel*Frame) : 2.357
        Time code of first frame : 00:10:19:13
        Time code source : Subcode time code
        Stream size : 11.3 GiB (100%)
        Encoding settings : wb mode= / white balance= / fcm=auto focus

        Audio #1
        ID : 0-0
        Format : PCM
        Muxing mode : DV
        Muxing mode, more info : Muxed in Video #1
        Duration : 56 min 22 s
        Bit rate mode : Constant
        Bit rate : 768 kb/s
        Encoded bit rate : 0 b/s
        Channel(s) : 2 channels
        Sampling rate : 32.0 kHz
        Bit depth : 12 bits
        Stream size : 310 MiB (3%)
        Encoded stream size : 0.00 Byte (0%)

        Audio #2
        ID : 0-1
        Format : PCM
        Muxing mode : DV
        Muxing mode, more info : Muxed in Video #1
        Duration : 56 min 22 s
        Bit rate mode : Constant
        Bit rate : 768 kb/s
        Encoded bit rate : 0 b/s
        Channel(s) : 2 channels
        Sampling rate : 32.0 kHz
        Bit depth : 12 bits
        Stream size : 310 MiB (3%)
        Encoded stream size : 0.00 Byte (0%)

        Reply
        • Lance Carr says

          19/07/2017 at 8:01 am

          Oh dear!
          That’s a DVCPRO file which from memory was a proprietary file type created by Panasonic in an effort to be as annoying as possible.
          It is a standard def file so… I am thinking here…. ummm.
          PD and most other current software probably don’t have codecs to deal with it.
          If it were me I would download another free program called Handbrake (Google it) and convert that file first to a standard dv.avi file (preferable) or failing that, an MP4.

          Reply
          • Ian F says

            20/07/2017 at 8:49 am

            LANCE,
            You my sir, are an absolute genius. I converted to MP4 and now PD accepts it. Thank you so much.

          • Lance Carr says

            21/07/2017 at 12:39 am

            Woohoo!

            Glad you got it going!

  8. Jake says

    09/07/2017 at 10:26 am

    Is it possible with this editor to make a video have a wider aspect ratio than 16:9(having much larger bars on the top and bottom)? I’ve seen it on other videos and it gives a different artistic look.

    Reply
    • Lance Carr says

      10/07/2017 at 3:16 am

      Hi Jake,
      All software is only going to offer you two or in the case of PD three aspect ratios for projects.
      They are 4:3 for standard definition footage and display.
      16:9 for widescreen footage and display.
      9:16 for vertical footage taken in portrait mode and display especially on social media.

      The effect you are talking about is not achieved by changing away from the usual aspect ratios.

      They are standardized so that playback can be achieved without problem on a wide range of devices.

      The way you would get the black bars at the sides or all around the footage is to overlay that footage on to a black background and resize it so it is smaller than the background.

      Simple to do in almost any video editing software.

      Reply
  9. Scott in VA says

    20/06/2017 at 3:52 pm

    Hi Lance,

    Great website. Way too much info for a simple guy like me, lol. I have a new laptop with Windows 10 and am one of many realizing that Movie Maker has gone bye bye and I’m looking for a replacement. You and many other sites seem to love Cyberlink PD as a solid piece of software, albeit probably more than what I need. My question… I have a Panasonic camcorder that records in ACVHD. I was looking at a comparison chart on another site that seemed to indicate that Cyberlink PD could not edit ACVHD material. Am I understanding this correctly? All this mumbo jumbo about file compatibility has this simple guy all confused. Talk to me like I’m 5, haha. Thanks!

    Reply
    • Lance Carr says

      21/06/2017 at 2:23 am

      Hi Scott,
      OK, so first of all make sure you have an adult with you when you are reading this and don’t forget to sound out the words as you are going along… mommy can probably help you with the big words.

      Hey! You asked for it!

      OK, so first off, the PowerDirector and AVCHD files thingy.

      Really? Some idiot actually wrote that? Sheesh!

      AVCHD is a proprietary form of H.264 files better known as MP4 in general use. The question as to whether any kind of software can handle them has almost nothing to do with the software.

      AVCHD files have in the past proven problematic on some systems because of the stress they place on the computer, NOT because of the software and this applies to any software brand.

      PowerDirector actually happens to be one of the best, if not THE best in marshaling the available resources of the computer it is installed on to best deal with these resource intensive files.

      It is one of the reasons I have it as my top choice on this site, hence my comment, “Some idiot actually wrote that?”

      Now that we have that out of the way here’s another curve ball for you!

      Given your relative inexperience and the fact that you are coming from the sadly decaying world of Movie Maker, I think PowerDirector may be overkill.

      Why not try Filmora? It is small, feature rich compared to what you are used to, eats up AVCHD files no problem and will be very easy for you to learn from the beginning.

      Anyway, just my thoughts!

      Questions?

      Reply
  10. Scott Hamill says

    12/04/2017 at 1:01 pm

    Hi Lance. I am editing 1080p 30fps video in Photoshop. The final output will be a DVD using PD15. What would you suggest is the best rednering setting in Photoshop in order to get the best quality DVD from PD15? I have tried a few different settings and they sure produce varying result, mainly differently levels of pixelation. Thoughts?

    Reply
    • Lance Carr says

      13/04/2017 at 3:32 am

      Hi Scott,
      OK, so for me the first red flag I am seeing here is that you are editing footage in Photoshop… really? Why?

      Can we at least clarify that apart because my first piece of advice would be to stop editing video in an image editing program!

      I’d add a “confused” emoji here but WordPress won’t let me.
      Lance

      Reply
  11. maticha Bernard says

    26/02/2017 at 1:12 pm

    i have been using pd r10 but recently have experienced a problem, after editing my movie ready for burning into a folder it takes long and the content of the movie is less than 4.7GB, for 14 hours it is still constant at 4%, were did i go wrong. secondly after editing how can i transfer and burn the content from a different computer. please help me.

    Reply
    • Lance Carr says

      27/02/2017 at 5:48 am

      First of all that version is getting a bit old now so there have probably been updates to other software and drivers on your computer that are making things a little unstable.

      Given the fact that you have provided relatively no information as to what files you are working with, the operating system of your computer or any hardware details I am afraid I can’t really tell “where you are going wrong.”

      If you provide a bit more information maybe we can get somewhere.

      Reply
  12. Bob says

    24/02/2017 at 1:03 pm

    I am currently using PD 13. I use the Slideshow – Motion feature (Ken Burns effect) a lot. My complaint about it is that it tends to overemphasize the pan/zoom effects so I find myself having to use the customize feature often. It would be nice to have a setting on this which would allow for a more subtle effect – i.e. the pan/zoom starting and ending frames for each slide would be closer to full frame and more subtle. (Apple does a good job of this btw). Has this idea been brought up or am I the only one? Any change in PD 14 or 15?

    Reply
    • Lance Carr says

      25/02/2017 at 12:52 am

      Hi Bob,
      I have taken a brief look around the PD forums to see if there is anything further on this but it seems to be “the way it is.”

      The preset Pan and zooms in all software comes with settings that are kind of guestimated to be an approximation of most situations.

      Of course this is actually impossible because every instance of using the filter is going to be different depending on image sizes, duration and actually what motion you really want.

      I am a little surprised that you can’t save your own personalized preset!

      I would recommend taking this over to the CyberLink forum and posting it there.

      There is a good possibility that someone over there has actually worked out a way to do it.

      Reply
  13. Jer says

    16/02/2017 at 7:10 pm

    I have PD15, and used previous versions as well. My problem is with publishing DVD disks. Previous version have output the file to a folder with a video.ts and audio.ts folder. Same thing happens with PD15 but I do not get the .IFO or other files needed for it to be recognized as a DVD video, only the .VOB files are created. So when I burn the output folder to a disk it is recognized as a data disk, rather than a normal playable DVD. The VOB files still play on the DVD but the menu is gone and it does not play like a normal DVD.

    Is there a setting I am missing, what is going on???

    Reply
    • Lance Carr says

      17/02/2017 at 2:53 am

      Hi Jeremy,
      Wow! I have never seen that before!
      So let me just get this totally clear.
      You burn the disc like normal but instead of actually “burning” you choose to create the project as a folder somewhere on your computer.
      PD15 does what it does and the result is that correctly you have a VIDEO_TS folder and an AUDIO_TS folder.

      BUT! Inside the VIDEO_TS folder there are only vob files and no .ifo or.bup files that have been created… right?

      Reply
      • Jer says

        18/02/2017 at 8:07 pm

        Yup. Burn to folder rather than burning to a disk. The output completes correctly and results in video.ts and Audio.ts folders. The audio.ts folder is empty (which is normal) and the video.ts has 4 or 5 VOB files (depending on the number of chapters I think) but nothing else. There should be .IFO files and some other files but there is nothing else in the folder. All the VOB files play correctly independently but burning software will not recognize it as a video DVD without the extra files.

        Thanks for your help and for the resources of the site!

        Reply
        • Lance Carr says

          20/02/2017 at 3:39 am

          Hi Jeremy,
          Well the slight delay in replying is down to two things.
          1. It was the weekend so I didn’t check messages and…
          2. I spent a lot of time staring at the wall trying to work out how the hell PD is managing to do that!
          I have never heard of anything like it!
          As a quick workaround you could try to burn to a Disc Image File and use that to burn.
          But that doesn’t address the strangeness of the lack of ifo and bup files.

          I have checked on the PD forum for anyone else reporting this but nothing there.

          I have no idea why it is doing that so I think your best bet is to go to the PD15 forum, post the problem there and see if anyone has any suggestions.

          Sorry I couldn’t be of more help.
          Lance

          Reply
      • Keith says

        24/02/2017 at 1:35 am

        Hey lance I recently have downloaded pd15 I wanted to know if digital juice content will work on power director 15 before I make Tht expensive purchase. & thanks This blog has been really helpful !

        Reply
        • Lance Carr says

          24/02/2017 at 2:14 am

          Hi Keith,
          OK, I just went over to Digital Juice to take another look to be sure.
          The vast majority of assets on offer there are already rendered to final files so I see no problem there.
          The only things that may not work are the one specifically created in and for After Effects because they, like the PSD file stuff will be proprietary Adobe files.
          Otherwise I think you are good to go.

          Reply
  14. Bill says

    09/01/2017 at 11:24 am

    Hello Lance and thank you for all this great advice! You are truly amazing. Now I am hoping you can help me. I purchased PD15 Ultimate and made a slideshow using the “Slideshow Creator” and about 70 high quality photos. Here is where I need advice; I noticed when I save the project to burn on DVD the quality of the sideshow is horrible. The faces are much softer and the overall quality is poor. However, if I save as MPEG4 the quality is understandably better. Question: why is the quality of the pictures so diminished by using the slideshow feature? I am thinking it may have to do with the animation and how PD downsizes the pictures. I understand about resolution, MPEG4, AVI, etc. and have used other programs that did not create such poor output. I also noticed the same when making a slideshow for Facebook. No one could even make out the faces. Am I doing something wrong? Thanks again! Bill

    Reply
    • Lance Carr says

      10/01/2017 at 2:00 am

      Hi Bill, there will always be to some degree a lesser quality displayed of still images in a video.

      It’s all to do with codecs and resolutions and blah, blah.

      Having said that it shouldn’t be “horrible!”

      The quality degradation you are seeing is because when you are aiming at a DVD the software is taking the resolution down to standard definition which is the default resolution for DVD.

      Remember, DVD is a standard resolution format.

      MPEG4 allows you to remain up into the High Definition world and retain quality.

      If you have a High Definition TV and a DVD player that can handle it you can burn to an ACVHD DVD which will allow you to retain quality.

      Reply
  15. OSVALDO says

    06/01/2017 at 9:32 pm

    Hi Lance, Happy New Year!

    I’m using PD13 for a while, but not heavily, though…

    Couldn’t find any page comparing PD13-14-15.

    Any chance to learn the differences so I can make a common sense decision what’s worth to do instead of just throwing money away in the latest?…

    Just wondering if I’m missing anything really key to make a significant difference for my less than once in a while trivial light use of it…

    Thanks, OSvaldo Schwarz

    Reply
    • Lance Carr says

      06/01/2017 at 11:55 pm

      Hi Osvaldo,
      Given that you only use it lightly I wouldn’t bother with updating right now.

      My advice would be to update to 16 when it is released regardless of whether it has new stuff you need or not.

      That way you get code improvements that you really can’t see as well as staying safely in the discounted upgrades cycle.

      Reply
      • OSVALDO says

        08/01/2017 at 10:05 pm

        Thank you, Lance! That’s what I was thinking about…

        God bless you!

        Reply

Primary Sidebar

Main Categories

  • Home Page
  • DIY Video Editor Blog
  • Choosing a Video Camera
  • Shooting Tips
  • How to Choose an Editor
  • Video Editing Tips
  • Getting Your Videos Online
  • Video Editing Software Reviews
  • Audio Tips
  • Video Courses
  • General Tips
  • CD, DVD, Blu-ray Disc Repair and Data Recovery
  • Quick Video Tips

Software Reviews

  • The Best Video Editing Software
  • Easy to Use Editing Software
  • CyberLink PowerDirector 19
  • CyberLink Director Suite 365
  • Corel VideoStudio 2020
  • Pinnacle Studio 24
  • Filmora X by Wondershare
  • Magix Movie Edit Pro
  • Vegas Movie Studio 17
  • Adobe Premiere Elements
  • muvee Reveal Encore
  • Magix Video Pro X
  • Camtasia Studio
  • ScreenFlow for Mac
  • Womble MPEG Video Wizard DVD
  • Multimedia Software

Footer

  • Contact
  • Disclosure
  • Sitemap
  • Privacy Policy
  • Terms of Use
  • About
Copyright © 2021 The DIY Video Editor
We use cookies to optimize the functionality of this website. If you continue to use this site we will assume that you are happy with it.OkPrivacy Policy