Codecs and Formats Explained
I have had a little outbreak around here recently of people asking for help with a certain type of problem.
I figured it was probably worthwhile to go over it in a more general sense here as it seems to be common.
The question or problem that has been coming up usually has something to do with being unable to play, import or process certain types of video files.
More often than not the person asking the question then proceeds to tell me that the file is an .avi file or and MP4 file or whatever.
The difficulty with this is that the real information you or I need is not what file type it is but what codec was used to create it.
And THAT is exactly where in most cases everything has gone off the rails.
One of the greater (and there are many!) misunderstandings that occurs when dealing with video files is the difference between a container file and the codec that was used to create it.
In the case of an .avi file the last time I read anything on it there were something like 600 different codecs that could possibly be used to create a file with the .avi extension!
So if you want to get good at this stuff one of the most basic pieces of information you need to get a grip on is the whole container file, codec differentiation.
Simply put, a codec is like a tiny piece of software that encodes or decodes digital video information.
It takes that stream of digital data coming from the sensor in your video camera and creates file that other software or devices can understand.
An example most people would be familiar with these days is the H.264 codec which is probably the most common codec being used to create video these days.
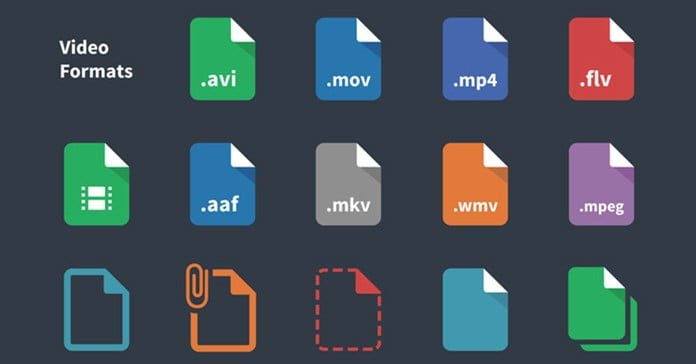
A container file (or wrapper file) is denoted by the extension it has as a file like .avi or .mp4.
Those are both examples of container files. Effectively they “wrap” the underlying video information in a way that allows software to understand them and subsequently play them back, render to new files or edit them.
So a device that uses the H.264 codec can possibly create an mp4 file, a .mov file and even a .avi file!
Regardless of the device reading, playing back or editing those files it must have the H.264 codec loaded to complete its tasks.
To get a complete grasp on the subject check out the video below for a good explanation.
Make Your Video More Cinematic
I haven’t added this video to the blog post because it is mother-load of riches on creating more cinematic looking videos!
Yes I know that’s what the title suggests but that’s not really what’s going on here.
The video simply walks through 10 specific points that separate an amateur video from a video that has that cinematic look.
My suggestion for using it is as an overall reference to subjects you might want to research or pursue.
Some points are pretty technical, some not so much so just pick one you think you can apply, research it and give it a try.
What could possibly go wrong!
Best Camera for YouTube Videos?
Apart from the series of articles I wrote HERE about how to choose a video camera I never really get into that subject too much.
My viewpoint on it is that if you already have a camera for taking video then that is the best camera for you!
On the other hand if you are looking for advice on which specific video camera to get you are better off learning how to do it yourself rather than taking someone’s word for it… especially mine!
However I do understand that trying to sort the wheat from the chaff when it comes to cameras for video can be a pretty daunting task.
In light of that you may want to check out the video below on choosing a good camera.
The title of the video is a little deceptive because although the creator is definitely talking about YouTube specific videos he covers in very simple terms many of the pro’s and cons of all types of cameras and not just from a YouTube point of view.
Microphone Shootout
One of the aspects of recording video in any situation that causes the most amount of grief is getting good quality audio.
Go to Amazon any time and check out microphones and you will see what a huge topic this is.
In an outdoor situation, using consumer level equipment your chances are not that good but there are a few things you can do to improve the situation.
Using external mics and using a decent wind filter are just a few that come to mind.
On the other hand in a “studio” type setting this can be more easily controlled but there are still a few pitfalls that can trip you up.
For people recording videos in that type of situation one of the keys is to make sure you are using a good microphone that is suited to your set up.
Most of us are not going to be recording in a soundproof booth and will probably be recording directly into a computer.
This introduces a couple of problems such as external noise from the environment, even if it is just sound bouncing around a bit and internal noise from the computer itself.
There are many choices of microphone suited to this scenario and this week I came across a pretty solid article that road tests a few of the better choices.
Be warned that the links on the site referred to below are affiliate links so the website owner does get a commission if you purchase through those links.
Having read the article and based on my own experience I prefer their number three choice, the Blue Yeti but that’s just me.
Of course at this point I think I am supposed to add my own affiliate link to the product and then tell you to read the article, come back here and buy through my link… sadly I am too lazy to do that.
Please don’t tell my wife.
Crazy Visual Techniques for Filmmaking
OK first up let me warn you that the video below is from Film Riot and although they often come up with a lot of great information that can be applied by the average person they are… annoying.
Over the years they have certainly toned down a bit with the “yahoo / woohoo” style presentation but they can still get on your nerves a bit!
Aside from that this video gives some excellent tips on creating in camera effects that can be finished off in an editor.
While we are on the subject of editing, the product they are using is Adobe After effects, so to many of you this part will be unfamiliar.
Just bear in mind that whatever it is the presenter is showing you in After Effects, you can do in just about any fully featured editing software like PowerDirector or VideoStudio or whatever.
Just listen to what he is saying about a particular effect and not so much how he is doing it in After Effects and you should be able to work out how it is done in your editing software of choice.
Motion Mask Tutorial – CyberLink PowerDirector
Another in the series of videos covering specific tasks in PowerDirector.
This time it covers Motion Masks and in going through the process gives a great overview of what can and cannot be achieved using this process.
Creating a mask in a video editor is not such a big deal these days but the problem with video is it keeps moving!
That’s where the motion masking effect comes in.
It provides you will the ability to mask something in a frame then have it automatically track that object as the video progresses.
Now given that the software can’t actually “see” the video you are masking there will be times you will need to stop, back up, reset the mask then continue but it sure beats the hell out of doing it by hand, frame by frame!
Pinnacle Studio – Reverse Effect Tutorial
This is just a quick run through in Pinnacle Studio of how to access and use the video reverse functions within the software.
Pretty straightforward process in most video editing software but as usual in Pinnacle there is so much more to it!
In fact this is a pretty good example of why one would choose Pinnacle over another editor at this level.
Pinnacle is by no means an easy program to learn but if you do, the possibilities as far as control are concerned are almost endless.
Most editors will offer the ability to speed up and slow down clips as well as being able to reverse them. Simple right?
And for most people this is enough.
In Pinnacle there are a heap of settings and controls available to complete the exact same task and so much more…. check it out.
Leave a Reply