This tutorial is specific to the action of using DVDRemake or DVDRemake Pro for merging or combining two or more DVDs into one DVD whilst retaining the full data and menu structure of the originals and with no loss of quality using either .
The merge DVDs procedure is exactly the same regardless of the size of the original DVDs you are working with.
However you may need other software to either re-compress the files to a single layer DVD size or use DVD Burning Software that will allow you to burn to a dual layer DVD disc.
Although the procedure for using DVDRemake or DVDRemake Pro to do this is quite simple I have laid out the steps in detail with lots of images so if the page is slow to load be patient. Theoretically each image is worth a thousand words!
Before you start to merge DVDs you will first need to download either DVDRemake for two DVDs into one or DVDRemake Pro for three or four DVDs into one.
If you want to know why only this software then go here to Merge Combine DVDs for the full story.
Click Here to Download DVDRemake or DVDRemake Pro
Preparation
Before we even get started it is a good idea to create the working folders for the program and the process.
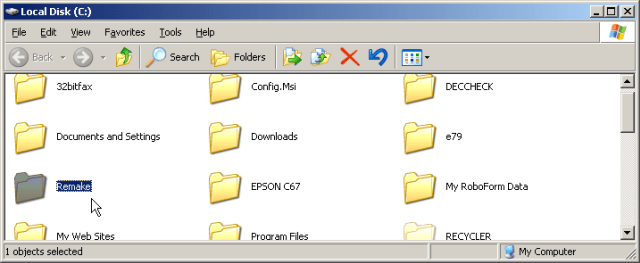
How and where you do this will depend on your computer set-up but for the purposes of this demonstration I created a folder on my C drive called “Remake” with the intention of using that one to store my imported DVDs.
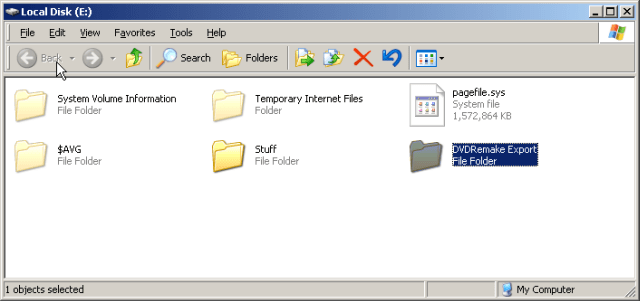
I then created a folder called “Remake export” on my E drive for when I export my newly merged DVD.
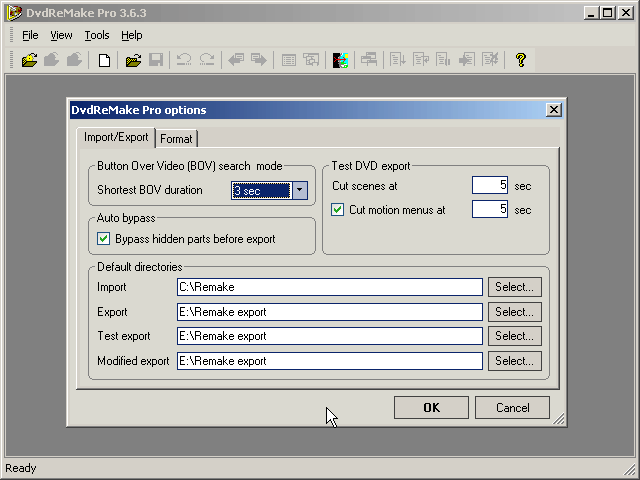
Now all you have to do is open DVDRemake Pro and go to “tools” “options” and you get the following dialogue box. Use the “select” buttons to navigate to your previously created folders, click “Ok” and you are set up and ready to go.
Ripping / Importing
Now that you have DVDRemake Pro set up the next few steps do not require that the program is open so you can shut it down at this point.
What you need to do now is to get the contents of the DVDs you want to merge on to your hard drive. For this demo I will be merging two of my own homemade videos. The procedure is the same for three or four DVDs into one.
The two DVDs I will be merging are one of my kid fooling around in the bath, called “Bathtime.”
The other is one of a school excursion to a place outside Taipei where we live called “Taoyuan.”
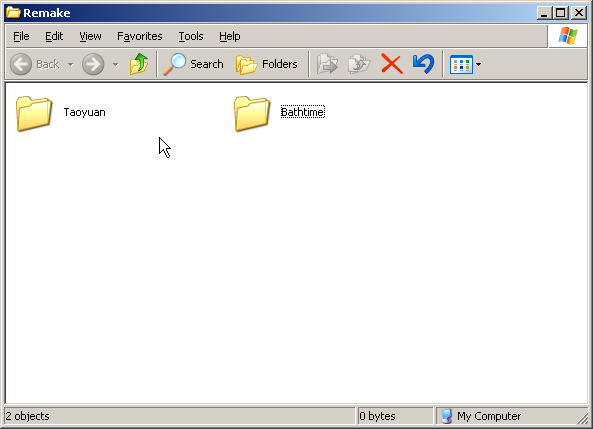
So before I begin to merge DVDs I create two folders in the “Remake ” folder on my C drive called “Bathtime” and “Taoyuan.”
I placed the “Bathtime” DVD in my computer DVD drive and selected “Open.” That reveals the VIDEO_TS and AUDIO_TS folders in the DVD. From there it it is simple matter of dragging those two folders across to the “Bathtime” folder.
Rinse and repeat for the next DVD which in this case is the “Taoyuan” DVD contents to the “Taoyuan” folder.
Now re-open DVDRemake Pro if you shut it down before and go to “file” “import DVD.”

You will get this dialogue box and using that I navigated to the “Remake” folder on my C drive.
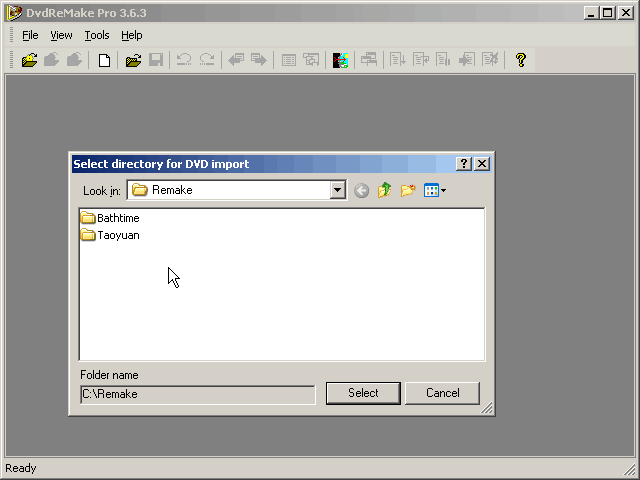
Then to the “Bathtime” folder.
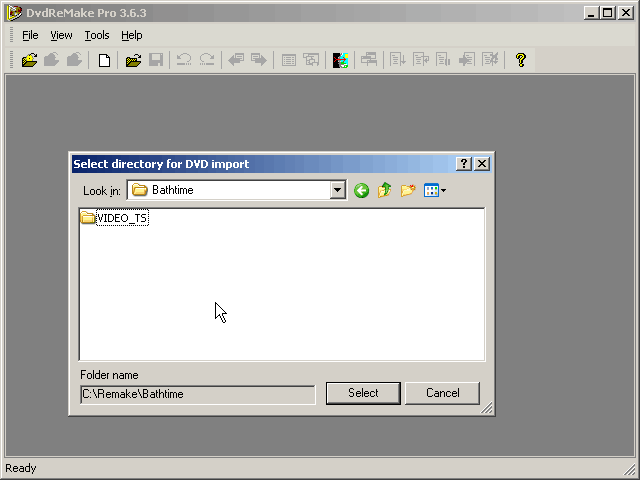
And finally to the VIDEO_TS folder of the “Bathtime” DVD. Make sure when you do this it looks exactly like the screeshot below with the BUP, IFO and VOB files showing.

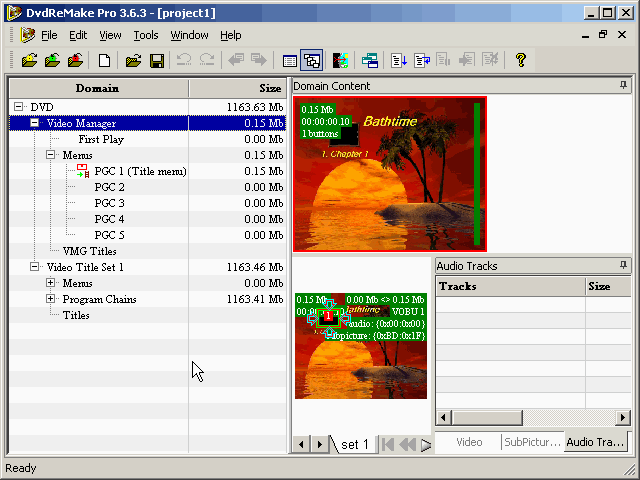
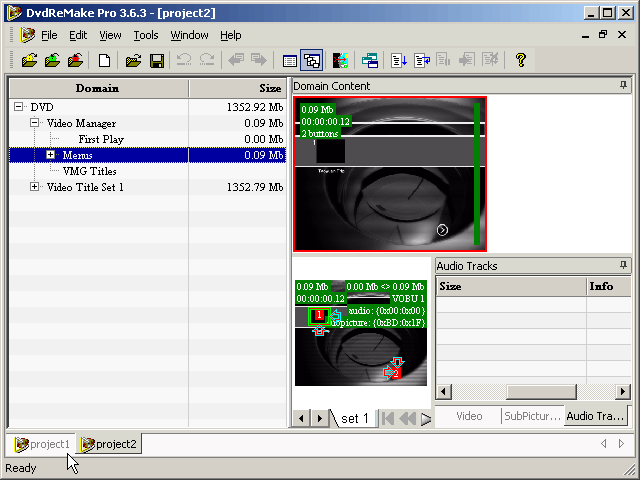
DVDRemake Pro will take a couple of minutes to read the data from the file and “voila!” The first DVD has been imported. DVDRemake will assign this as “Project 1.”
When you import the next DVD that will become “project 2.” These projects will appear as tabs at the bottom of the screen.
I repeated the same procedure for the “Taoyuan” DVD and the screenshot below shows that we now have Project 1 and Project 2 tabs at the bottom of the screen.
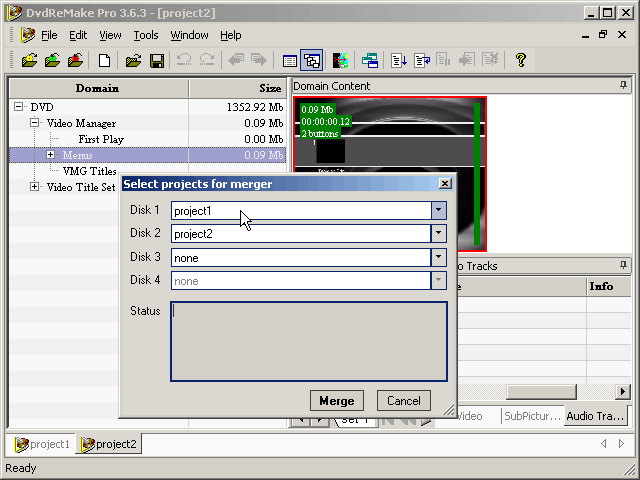
Go to “Tools” and select “merge DVDs.”

The dialogue box shown below will now appear. For DVDRemake you can select two projects and for DVDRemake Pro you can select up to four projects.
Hit the “Merge ” button and it will only take DVDRemake Pro a few seconds to compile the new DVD project.
Just remember that if you are using mini DVDs you will fit three mini DVDs filled to capacity on a standard DVD without any further processing.
If you go for four filled mini DVDs at the later burning stage you will need DVD Burning Software that has the capability of re-compressing the files down to the size of a full sized DVD.
That may result in loss of quality. Or, go to a dual layer DVD.
As you can see in the screenshot below DVDRemake Pro has merged the two orginal DVDs into one and that has now appeared as “Project 3.”

With the “project 3″ tab selected go to “File” and select “Export DVD.”

DVDRemake Pro will confirm the selection you made earlier for the location of the final exported DVD files. Click “select” and it will take from 15 to 20 mins to create your new DVD files.
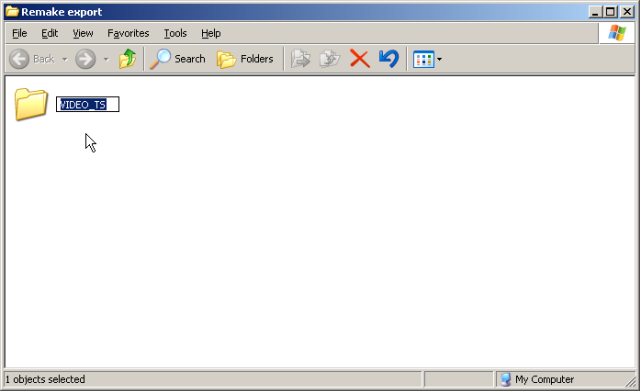
When DVDRemake Pro has finished creating all the new DVD files simply select them all and drag them into a folder called VIDEO_TS exactly as I have written it. This folder can now be used by your DVD Burning Software to burn a new DVD with your favorite DVD burning software. That’s it!
Leave a Reply