The Importance of Videography Skills
With the rise of social media platforms and the increasing demand for video content the ability to produce high-quality videos can set you apart from crowd regardless of your intent.
Whether it’s for marketing, education, entertainment or personal branding videos have the power to capture attention, evoke emotions and convey messages effectively.
Honing your videography skills can significantly impact your ability to engage with an audience and leave a lasting impression.
Overview of Enhancing Video Quality
To achieve a professional look in your videos it’s essential to understand and implement various techniques that ultimately contribute to video quality.
This article will cover tips ranging from pre-production planning to post-production editing.
Key areas of focus will include the importance of composition and framing, the role of lighting and exposure in creating the desired mood and the significance of capturing high-quality audio.
Additionally, we’ll explore filming techniques that add a polished feel to your videos and editing strategies that enhance the storytelling aspect.
By applying these tips you can elevate your work from amateur to professional-grade content.
Understanding the Audience and Purpose of the Video
Before diving into the technical aspects of videography it’s crucial to understand the intended audience and the purpose of the video.
Knowing who the intended viewers are should guide the tone, style and content of the video.
For instance a video aimed at a corporate audience will differ significantly from one intended for a younger or more casual demographic.
Similarly the purpose of the video whether to inform, entertain, sell or educate will dictate the approach to videography.
By aligning the video’s style and message with the audience’s expectations and the video’s objectives videographers can create content that resonates and fulfills its intended function.
Pre-Production Essentials
Conducting Thorough Research
Before the cameras start rolling it is important to do your research.
This involves understanding the subject matter, scouting locations and knowing your target audience.
Research lays the groundwork for a successful production ensuring that the content is relevant and engaging.
It also helps in anticipating and mitigating potential challenges that may arise during the shoot.
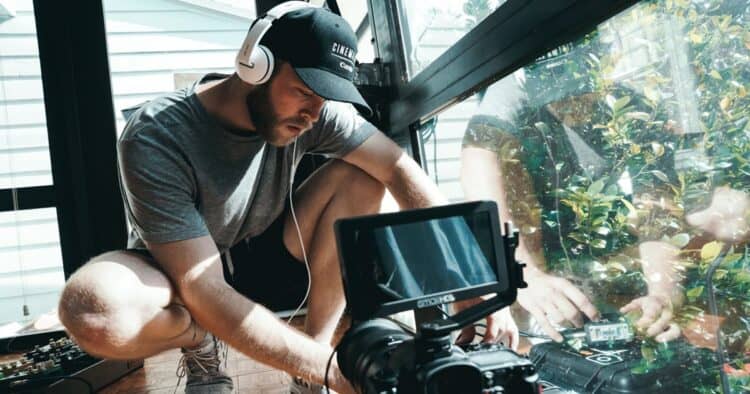
Equipment Selection and Setup
Choosing the right equipment is crucial for achieving a professional look.
Having said the bear in mind that the equipment you use will only produce results that reflect your ability to use that equipment.
So do your homework and learn to use you tools effectively.
Beginners may start with a smartphone or basic DSLR while more advanced videographers might opt for higher-end gear.
Essential equipment includes a reliable camera, a sturdy tripod, a gimbal stabilizer for smooth shots and an external microphone for clear audio.
Lighting is also key; whether utilizing natural light or artificial setups, understanding three-point lighting will enhance the visual quality of the video.
Storyboarding and Planning the Shoot
A storyboard is a visual representation of how your video will unfold shot by shot.
It’s a crucial tool for pre-visualization and ensures that everyone involved in the production is on the same page even if you are operating as a one man band.
When planning the shoot, consider the script, the sequence of shots, and how they contribute to the story. Remember, no artistic skills are required to create a storyboard, but clarity in vision is essential.
Understanding and Choosing the Right Talent
If your project involves people other than yourself in front of the camera it is vital that you make good choices for those roles based on your research regarding the purpose of the video and the intended audience.
The talent in front of the camera can make or break your video.
Whether you’re working with professional actors or real-life participants, it’s important to choose individuals who best represent the characters or subjects of your video.
Consider not only their appearance and acting ability but also their reliability and comfort in front of the camera.
If possible, conduct auditions or interviews to gauge their suitability for the role or function within the video itself.
In conclusion, the pre-production phase is about meticulous planning and preparation.
By conducting thorough research, selecting the right equipment, storyboarding and choosing appropriate talent, you lay a solid foundation for a professional-looking video.
Remember the time invested in pre-production can save countless hours in post-production and can make the difference between an amateurish result and a polished, professional video.
Composition and Framing Techniques
Mastering the Rule of Thirds
The Rule of Thirds is a fundamental principle in videography that involves dividing the frame into nine equal segments by two vertical and two horizontal lines.
This creates four points of intersection to which the eye is naturally drawn.
Placing your subject or important compositional elements at these intersections or along the lines can create a more balanced, engaging and aesthetically pleasing shot.
To effectively utilize the Rule of Thirds imagine your frame with this grid and try to align the subject using these points.
This technique not only adds interest but also guides the viewer’s eye through the scene making for a more dynamic and professional-looking video.
Utilizing Foreground and Background
Adding depth to your shots can greatly enhance the visual appeal of your videos and is probably one of the key differences between professionally shot footage and that of an amateur.
By utilizing foreground and background elements you add a sense of three-dimensionality leading the viewer’s eye towards the main points of interest.
Similarly, having a detailed background can add context and tell a more comprehensive story.
However it’s important to ensure that these elements do not distract from the main subject so use them to complement the focal point, not to compete with it.
The Impact of Camera Angles and Perspectives
Different camera angles and perspectives can dramatically alter the mood and meaning and audience perception of a shot.
For instance, a low-angle shot can make a subject look powerful or imposing while a high-angle shot might make the same subject appear vulnerable or small.
Similarly, a bird’s-eye view can provide an omniscient perspective and a worm’s-eye view can introduce an unusual and intriguing angle that captivates the audience.
Experimenting with various angles and perspectives can add visual interest and narrative depth to your videos and it is crucial to choose the angle that best suits the story you’re trying to tell and the emotions you wish to convey.
Lighting and Exposure for Visual Storytelling
The Role of Lighting in Mood and Atmosphere
Lighting is a pivotal element in videography that significantly influences the mood and atmosphere of a scene.
It is not just a technical detail that needs to be addressed to achieve quality footage although it certainly does have that as part of it.
It can be used to evoke emotions, highlight important details and create visual depth.
For example soft, diffused lighting often conveys a gentle and romantic mood while harsh, direct lighting can create tension and drama.
Understanding the interplay between light and shadow is essential for videographers aiming to tell a compelling story.
By manipulating the intensity, direction and color of light, videographers can sculpt the visual narrative and guide the viewer’s emotional response.
Achieving Consistent Exposure Across Shots
Consistency in exposure is crucial for maintaining the professional look of a video.
Fluctuations in exposure can distract the viewer and detract from the story and most often this occurs on a subconscious level.
The viewer may not necessarily be aware of what changed but will experience a sense of something having changed which they can’t quite put their finger on.
This leads to moments of distraction while the audience is trying to work out what happened.
To achieve consistent exposure you as a videographer must understand your camera’s settings and utilize tools such as histograms and zebras.
It’s important to decide on an exposure strategy before shooting whether it’s maintaining a specific aperture for depth of field, adjusting shutter speed, or using neutral density filters to manage light levels.
Consistency also extends to shot-to-shot lighting conditions which can be controlled through careful planning and the use of artificial lighting when natural light is variable.
White Balance and Color Temperature Considerations
White balance and color temperature are critical for ensuring that the colors in your video appear natural and consistent.
Different light sources emit light at different color temperatures measured in Kelvin (K).
For example daylight has a cooler, bluer tone while tungsten lighting is warmer, with a yellow-orange hue.
Videographers adjust the white balance to compensate for these variations ensuring that white appears as true white under different lighting conditions.
This adjustment can be done manually or by selecting the appropriate preset on the camera.
Paying attention to white balance not only maintains color fidelity but also affects the overall mood of the video,as color temperature can subtly influence the viewer’s perception of the scene.
Capturing High-Quality Audio
The Significance of Sound in Video
Sound is a critical component of video production that can make or break the viewer’s experience and some may argue that it is the most important element.
It’s not just about the clarity of dialogue or the loudness of effects; it’s about the emotional resonance and the atmosphere that audio brings to what is being presented visually.
Good audio can immerse an audience, create tension,or evoke emotions while poor audio can distract and disengage them.
Therefore capturing high-quality audio is as important as achieving crisp and well-composed visuals.
Choosing the Right Microphones
Selecting the appropriate microphone is essential for capturing the best possible sound for your video.
The choice depends on the type of video you’re producing and the environment you’re recording in.
For interviews or dialogue lapel mics are often used as they can be discreetly attached to clothing close to the speaker’s mouth.
In contrast shotgun mics are ideal for directional audio capture which is perfect for on-location shoots.
For more controlled environments such as a studio condenser mics may be the best choice for their sensitivity and range.
It’s also wise to consider accessories like windshields for outdoor shooting and mic stands for stable placement.
Audio Recording Techniques and Monitoring
Once you have the right microphone employing proper recording techniques is crucial.
Always conduct a sound check before recording to ensure levels are optimal and there’s no unwanted background noise.
Keep the microphone at a consistent distance from the sound source to avoid volume fluctuations and try to position the microphone as close as possible.
If you’re filming outdoors be mindful of wind and ambient noise that can obscure your audio.
Using a windscreen (sometimes referred to as a dead cat) can mitigate these issues but also develop an awareness of what is happening in the area around you.
It is easy to become focussed on the action you are capturing and not notice what is happening in the wider area.
Monitoring your audio in real-time is very desirable if possible.
Using headphones to listen to the audio as it’s being recorded allows you to catch and rectify issues immediately rather than discovering them in post-production when it may be too late.
Pay attention to the audio levels on your recording device ensuring they’re neither too low (which can result in a weak, noisy signal) nor too high (which can cause clipping and distortion).
Capturing high-quality audio involves understanding its significance, choosing the right microphones and employing effective recording and monitoring techniques.
By giving audio the attention it deserves you can significantly enhance the professionalism and overall impact of your videos.
Filming Techniques for a Professional Look
Camera Movement and Stabilization
Creating professional-looking videos requires more than just a steady hand; it involves understanding and mastering camera movement and stabilization techniques.
While tripods are the go-to for stability they can be both cumbersome and restrictive.
To add dynamism to your shots practice handheld techniques using your body as a brace against stable objects for smoother footage.
Embrace camera movement to follow the action or to reveal new aspects of a scene but do so with purpose.
Movements like pans and tilts should be motivated by the story you’re telling, not just for the sake of motion.
Manual Focus and Depth of Field Effects
Autofocus in its place can be a helpful tool but for a truly professional look mastering manual focus is key.
It allows for precise control over what part of your shot is in sharp focus (depth of field) which can guide the viewer’s attention.
Depth of field, the range of distance within which objects appear sharp, is a powerful storytelling tool.
A shallow depth of field can isolate your subject creating intimacy while a deep depth of field can place them within the context of their surroundings.
Experiment with different aperture settings and focal lengths to achieve the desired effect and always ensure your main subject is in clear focus.
Avoiding Common Shooting Mistakes
To elevate the quality of your videos be mindful of the most common shooting mistakes.
Avoid excessive zooming and panning which can disorient your audience and make the overall visual experience confusing.
Instead, move closer to your subject for more intimate shots paying attention to the rule of thirds for balanced compositions.
Always keep an eye on the background to avoid distracting elements such as unwanted objects or activities.
When shooting outdoors always consider the sun’s position to avoid harsh shadows, silhouettes or exposure blowouts.
When indoors supplement natural light to avoid grainy footage and always consider that normal indoor lighting is classed as “low light.”.
Post-Production and Editing Strategies
Editing with the Final Product in Mind
Editing is not just about cutting and joining clips, it’s a thoughtful process that requires envisioning the final product from the start.
When editing consider the narrative flow, pacing and how each scene contributes to the overall story.
It’s crucial to maintain a consistent style and tone throughout the video.
Keep your audience engaged by trimming unnecessary footage and focusing on the content that adds value and furthers the story.
Remember, sometimes less is more and a well-placed cut can have a significant impact on the viewer’s experience.
Applying Cinematic Techniques in Post-Production
Post-production is where the magic happens transforming raw footage into a polished piece of art.
Utilize cinematic techniques such as color grading to set the mood and add visual effects sparingly to enhance, not distract.
Techniques like L-cuts and J-cuts can create a seamless flow between scenes,while the use of music and sound effects should complement the visuals and drive the narrative forward.
The goal is to create an immersive experience that captivates your audience.
Ensuring Visual and Audio Continuity
Continuity is key to maintaining the illusion of reality in your video.
Pay close attention to visual elements such as lighting, color, and composition to ensure they match from shot to shot.
Audio continuity is equally important so use room tones and ambient sound to smooth over cuts and maintain a consistent audio landscape.
When dialogue is involved, ensure lip-sync is precise and the tone matches the visuals.
By keeping a keen eye and ear on continuity, you’ll create a more professional and believable video that resonates with viewers.
Leave a Reply