
Unlocking the Full Potential of Your Video Camera or Phone
If you’re just starting out in the world of videography you’ve probably been relying on your camera or phone’s automatic settings to capture footage.
While these automatic modes can certainly produce decent results they also significantly limit your creative control and prevent you from achieving the highest possible video quality.
To truly unlock the full potential of your camera and take your videography to the next level it really helps to learn how to shoot in manual mode.
By manually adjusting settings like aperture, shutter speed, ISO and white balance you gain complete command over critical factors like exposure, depth of field and low-light performance.
It also ensures that you can maintain consistency in the look and feel of your footage from shot to shot.
Remember that all auto settings both in phones and cameras are based on an approximation of the information coming in through the lens and hitting the sensor.
The device can’t actually see and interpret what it is looking at so relies on sophisticated software to make a “best guess” at how things should be adjusted.
Working manually allows you to intentionally determine the look and feel of your videos rather than leaving it up to your camera’s automated guesswork.
Advantages of Shooting in Manual Mode
Consistent Exposure Control
One of the most significant advantages of shooting in manual mode is the ability to maintain consistent exposure throughout your video.
Automatic exposure modes can cause unwanted fluctuations in brightness as the camera adjusts then re-adjusts to changing lighting conditions.
Imagine you are standing in front of a white background with your hands at you side wearing dark clothing.
The camera “sees” that and adjusts the exposure accordingly based on the overall amount of light coming in.
Now imagine you raise your arms to an outstretched position.
What the camera “sees” is that the amount of overall light coming into the sensor has reduced so it raises the exposure levels to compensate.
It is those tiny fluctuations that cause slight changes to be occurring in exposure resulting in an amateurish look to the footage.
By setting your exposure manually you ensure that your footage maintains a consistent look even as you move between different environments or lighting scenarios.
Depth of Field Control
Depth of field refers to the amount of your scene that appears in focus with regards to things closer or more distant from the camera.

It’s a powerful creative tool for drawing attention to your subject or creating a specific mood by either isolating the subject within the scene or including the entire scene.
In automatic mode your camera determines the depth of field based on its own algorithms often resulting in a deep focus that may not align with your intention.
This tendency towards deep focus rather than shallow depth of field allows the camera to maintain focus more reliably and is more for the camera’s benefit than any thought of creative endeavour.
By manually adjusting your aperture (more on that later) you can precisely control the depth of field allowing you to isolate your subject with a shallow focus or capture expansive scenes with everything in sharp detail.
Low-Light Performance
Many automatic modes struggle in low-light situations often resulting in grainy, noisy footage or having unwanted motion blur due to slow shutter speeds.
As you continue through this article you should begin to understand why this is the case but the short of it is that when presented with low light, the auto settings will try to raise the ISO or slow the shutter speed.
Whilst those actions will certainly achieve the desired increase in exposure, they may not be the best solution from both a technical or creative point of view.
When shooting in manual mode you can intentionally increase your ISO (sensor sensitivity) to capture cleaner, sharper low-light footage or you can also adjust your shutter speed to compensate for the low light while still getting the effect you want.
Consistent Color and White Balance
Automatic white balance settings can sometimes produce unrealistic or inconsistent colors especially when shooting in mixed lighting conditions.
This unnatural color most often manifests as what is called a color cast where everything in the image has an overly bluish or yellowish tint to it.
By manually setting your white balance (more on that later), you can ensure that your footage maintains accurate, natural-looking colors throughout your video, regardless of the lighting environment or changes occurring within that environment.
Understanding Aperture, Shutter Speed, and ISO
Now that we have covered a few of the reasons for shooting in manual mode let’s dive into the main settings you’ll need to master: aperture, shutter speed, ISO and white balance.
Aperture
The aperture is the opening in your camera’s lens that allows light to pass through and reach the sensor.
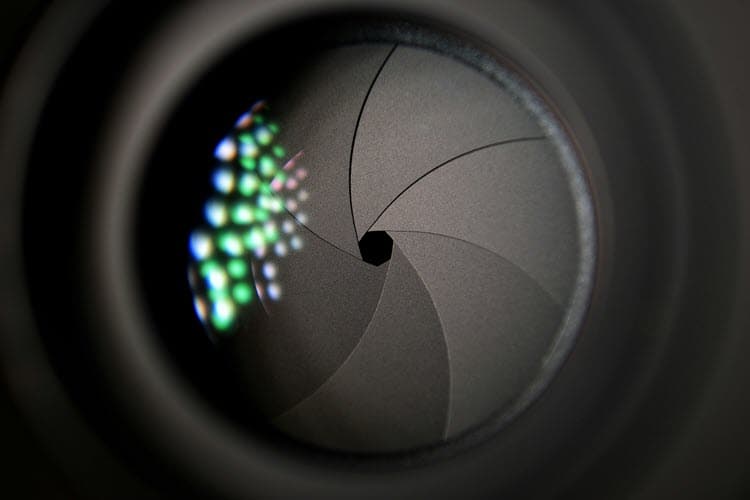
A larger aperture (represented by a smaller f-number, like f/2.8) allows more light to enter the camera, while a smaller aperture (larger f-number, like f/16) restricts the amount of light.
In addition to controlling exposure the aperture also affects depth of field.
A larger aperture (smaller f-number) results in a shallower depth of field, which can be useful for isolating your subject and creating a pleasing bokeh (blur) effect in the background.
Conversely, a smaller aperture (larger f-number) increases the depth of field, keeping more of the scene in focus.
Shutter Speed
The shutter speed determines how long the camera’s sensor is exposed to light.
A faster shutter speed (like 1/1000th of a second) allows less light to reach the sensor effectively freezing motion and reducing blur.
A slower shutter speed (like 1/30th of a second) allows more light to enter the camera which can be useful in low-light situations but can also introduce motion blur if your subject or camera is moving.
When shooting video it’s generally recommended to use a shutter speed around double your frame rate (e.g., 1/50th for 24fps, 1/60th for 30fps) to achieve a natural-looking motion blur.
Remember that when we talk about “natural motion blur” we are referring to the motion blur you and I see in real life using our eyes.
If you have read this far and were beginning to get a little overwhelmed by all of this then consider this your first “break point!”
Remember, your exposure is controlled by aperture, shutter speed and ISO yet in this section we just eliminated shutter speed as a factor!
The rule is that the shutter speed is twice the frame rate so you don’t need to think about that anymore!
ISO Setting
The ISO setting determines your camera’s sensor sensitivity to light and it is easiest to think of it like a sort of volume knob for the sensor.
A higher ISO (like 1600 or 3200) makes the sensor more sensitive, allowing you to shoot in low-light conditions without changing shutter speed or aperture.
However as you begin to move towards higher ISOs there is a tendency for more digital noise or grain to be introduced into your footage.
Exactly at what point that becomes noticeable depends on the camera or phone you are using.
A lower ISO (like 100 or 200) produces cleaner, sharper images but requires more light to achieve proper exposure.
Although there is a lot of advice floating around about ISO and the introduction of grain into the image it is important to note that modern cameras can run at quite high ISO’s before this becomes a problem.
Having said that, when shooting in well-lit conditions it’s generally best to aim for the lowest possible ISO to maintain maximum image quality.
Balancing Aperture, Shutter Speed, and ISO for Exposure
The exposure triangle is the fundamental concept that ties aperture, shutter speed, and ISO together.
To achieve a properly exposed image or video, you need to balance these three settings based on the available light and your creative goals.
But remember, we have already removed the need to decide on a shutter speed because the frame rate of the video you are shooting has determined that already.
For example, let’s say you’re shooting a video interview indoors with limited natural light.
You might start by setting a moderately wide aperture (like f/4) to allow in enough light while still maintaining a pleasing shallow depth of field to separate your subject from the background.
Your shutter speed (perhaps 1/60th for a natural motion blur at 30fps) is already fixed so that only leaves the ISO (maybe 800 or 1600, depending on the light) to achieve a well-exposed image.
The key is to understand how adjusting each setting affects the exposure and aesthetic qualities of your footage and then balancing them according to your creative goals and the lighting conditions.
White Balance: Achieving Natural-Looking Colors
White balance is an often overlooked but crucial aspect of capturing accurate, natural-looking colors in your video footage.
Every light source (sunlight, incandescent bulbs, fluorescent lights, etc.) has a different color temperature, which can cast unwanted color casts or tints onto your footage if not properly compensated for.
When you and I look at a scene our eyes work with our brains to see and interpret the colors accurately.
Most cameras offer automatic white balance settings that attempt to replicate what you and I do but as mentioned earlier, these automatic settings can sometimes produce unrealistic or inconsistent results, especially in mixed lighting conditions.
The main reason for this is that the automatic white balance function inspects the scene being captured and assumes that the brightest spot in that scene is white.
That point then becomes the reference point from which the camera software “calculates” what all the other colors should be.
So if a yellowish bare electric globe is the brightest spot in the scene the software assumes this is white, the result being an unnatural color cast over the entire scene.
Another setting called Average White Balance can be used but again this is fraught with problems.
In that setting the camera gathers all the available data from the scene and works out an average of the color values then sets the white balance from that average.
It may be close, it may not! Either way, if the light changes in any way as you are shooting there may be noticable changes to the color values of the scene as it progresses.
That beautiful blue sky that you are shooting may suddenly turn greenish as a cloud passes in front of the sun and all the color values get recalculated.
By manually setting your white balance you can ensure that your footage maintains accurate, natural-looking colors throughout your video.
Many cameras and phones allow you to set a custom white balance by pointing the camera at a neutral gray or white surface and telling the camera to calibrate based on that reference point.
Alternatively, you can select a preset white balance setting based on the type of lighting you’re shooting in (daylight, tungsten, fluorescent, etc.).
Although using a preset is not the perfect solution it is much better than auto white balance because it sets and holds the white balance for all of the subsequent footage.
Later when you get the footage into video editing software you can achieve effective color correction of the white balance because even though it may be a little off, it is all consistently the same “off.”
It’s also often a good idea to check and adjust your white balance as you move between different lighting environments to maintain accurate colors.
Manual Settings Made Simple
While mastering manual settings like aperture, shutter speed, ISO, and white balance may seem daunting at first, it’s an essential step in elevating your videography skills and unlocking the full creative potential of your camera.
Although the whole formula may seem daunting at first it really is far simpler than you may think.
Take any scene or shot you are going for and work your way through the following decisions.
The shutter speed has already been worked out so there’s nothing further to add there.
The next question is whether you want all of the scene in focus or the subject in focus with a blurred background.
For that either open the aperture to get shallow depth of field or close it down to achieve everything in focus.
At that point your only control is the ISO so set that so that the scene look well exposed and you are pretty much done!
Choose a suitable preset white balance or set it with a white balance card and from there you can start shooting.
Like most things in life once you gain the knowledge of what everything is doing and why, it all begins to boil down to a simplicity.
For further study here’s a great video on setting your exposure and white balance using tools specifically designed for the job.
Leave a Reply